Save hours on social, every day.
Automate moderation and replies, schedule posts, and pull reports - all in one tool.
We’ve all heard the story of the slow extinction of in-person shoppers, the empty town centres and long-suffering retailers. The truth is, people still spend money on “stuff”, they just do it mostly online. And, an increasing number of those are purchasing on social media.
E-commerce grows steadily for the last 20 years, with some difficulties at the turn of 2008 and 2009. The same with Facebook.
With almost two and a half billion active monthly users, Facebook is the obvious choice for eCommerce businesses looking to capitalise on this trend. Its reach is unparalleled. Over a quarter of the planet’s population regularly uses Facebook and 1.3 billion log in every single day.
According to Facebook’s data, it’s an increasingly popular place to buy. Click-through rates for eCommerce brands have tripled in the past two years. Which explains why there are some 80 million businesses on Facebook all vying for our attention.
But, with so much competition, how does any single business stand out?
In this article, we’ll showcase the 8 most effective in- and off-platform tools that will help you build your Facebook eCommerce empire and boost that crucial bottom line:
- Facebook Shop
- NapoleonCat
- Store Ya
- Shopify
- Facebook Pixel
- DataFeedWatch
- Facebook Marketplace
- Facebook Messenger
- ManyChat
1. Facebook Shop
If you have a Business Page and are looking for an easy way to sell on Facebook, opening a Facebook Shop is the way to go. It’s specifically intended for sellers offering physical items. That means no software, eBooks, knitting patterns or other digital items. Just holdable, wearable, sniffable stuff. You can list as many products as you want in your Shop and create Collections. e.g. ‘Mens’ and ‘Women’s’, that allow potential customers to shop by category. And, if they have a question about what you offer, they can easily send you a message through your Business Page. Payments in Facebook Shops are handled through Paypal and Stripe.
Price plans
Facebook Shop is free to set up but most merchants pay for a third-party tool to help them manage it.
Get started
To set up a Shop on Facebook:
- Find the ‘+ Add Shop Section’ link to the right of ‘More’ in your Business Page and click it
- Read and agree to Facebook’s merchant T&Ps
- Complete your business’s Payment and Processing details
- Describe the items you’re going to sell
- Add your product details
Adding products can be as complicated as populating your Shop from within the platform itself. Or, as easy as importing existing listings from other sites, which brings me to…
2. NapoleonCat
Social customer service is a crucial element of selling on social media – or using social media to support your sales.
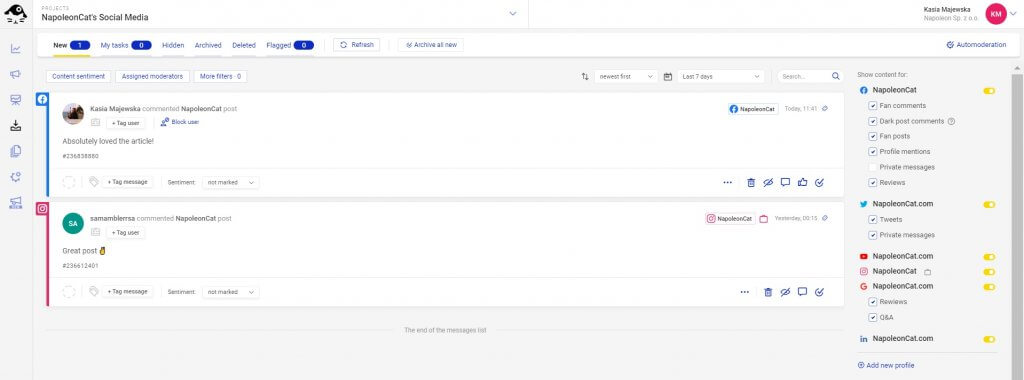
NapoleonCat helps brands manage Facebook conversations and provide a seamless, in-platform customer experience for Facebook users interacting with your brand.
Why should you care? Because skillful moderation can help you significantly improve your response rates and direct potential buyers towards the point of purchase more effectively.
If you run multiple Facebook pages, you’ll be able to manage incoming messages and comments (including comments added to Facebook Ads) from all accounts in one dashboard, a.k.a the Social Inbox. You can moderate the conversations manually or use NapoleonCat’s automation solutions to provide customer service hands-free outside of your working hours. NapoleonCat’s automation solutions allow you to automatically answer, hide, delete, flag, and forward messages depending on their content. This means that you can set up auto-replies to frequently asked questions and automatically hide or delete hateful language and other unwanted content.
Price plans
You only pay for what you use. Prices are fully customizable and depend on the number of social media profiles you want to manage or monitor and the size of your social media team. Plans start at $27 per month.
Get started
NapoleonCat offers a free 2-week trial. All you need to do is sign up and connect your profiles. You can add both profiles you manage and public profiles you wish to follow. Wait for NapoleonCat to fetch your data and… you’re all set!

Master customer service on Facebook
Deliver timely responses to customers in social media. Manage unlimited Facebook Pages in a single inbox. Our customers reduce their response time by 66% – with an all-in-one social media tool.
3. Store Ya
StoreYa is best known as a Magento integration (more on that here). So, what’s it doing in a list of Facebook eCommerce tools? Well… one of its lesser-known features is its ability to integrate your Facebook Shop with a host of other popular eCommerce platforms. Think Etsy, Amazon and eBay. Those of you who’ve had your morning coffee will already understand what that means. If you already sell your products elsewhere, you can fill your Facebook Shop with the product details of existing listings using a one-click import. This sets a pretty low barrier of entry to sell on Facebook for those with established online stores elsewhere.
As if that wasn’t good enough… StoreYa’s features also include real-time KPI tracking and a range of kick-ass marketing tools to boost your conversions. For example, you can add a pop-up coupon or “scratch to win” game to your shop that rewards your potential customers for browsing.
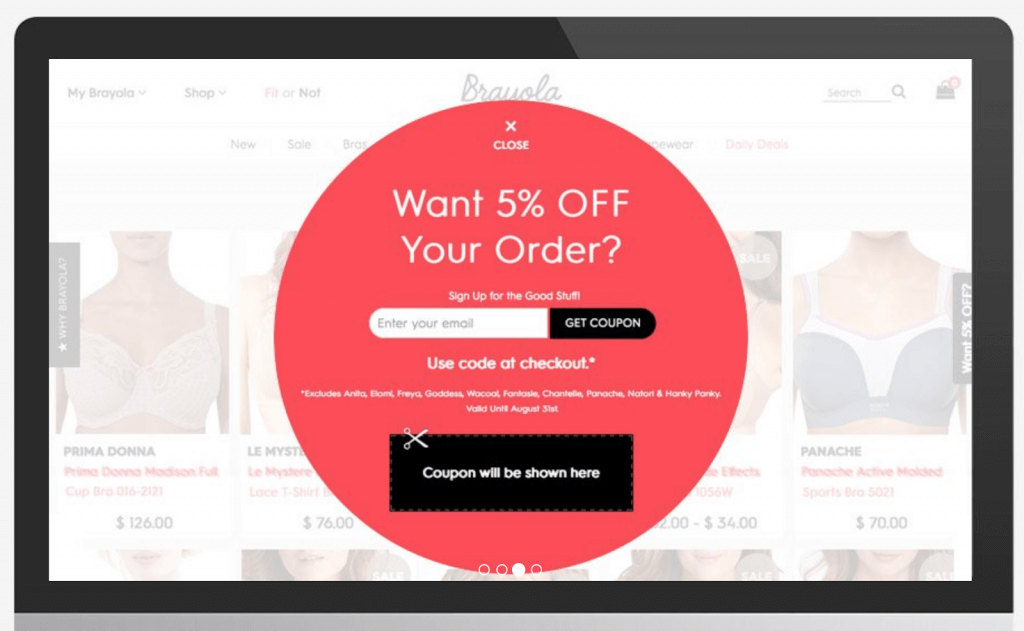
According to StoreYa, this feature can increase monthly sales by up to 33%, which sounds like it’s worth the fee.
Price plans
As always, there is a free option to reel you in, but it doesn’t cover much. That said, the premium plans are affordable. Pricing plans for the Facebook Shop integration start from $0 and go up to $79.99 / month. The coupon pop-up tool costs from $9.99 / month.
Get started
As long as you already have listings and product details on an eCommerce platform that StoreYa integrates with, getting started is as simple as choosing and paying for a pricing plan.
4. Shopify
Another way to take the pain out of populating and managing your Facebook shop is to use Shopify. If you have existing products on the popular eCommerce platform, you can display them in your newly-opened Facebook Shop with a few clicks of a button. If you choose this route, you’ll also be able to review sales, edit product pages, fulfill orders and track data in Shopify, which is handy since it’s a bit of a pain to do those things within Facebook itself. You can also link Shopify to Facebook Pixel (more on that later) so you can analyse the traffic you’re directing to your shop from your activities on Facebook.
Pricing plans
You can set up a Shopify account for as little as $29. An Advanced account tops out at $299. All plans include unlimited product listings. The main difference between them is the reports you have access to and how many ‘seats’ or staff accounts you can have. The basic plan only includes two, so if you have a large team already, it’s going to be more expensive.
Get started
First, you’ll need a Shopify account with some active listings.
To connect Shopify to your Facebook shop and your Pixel:
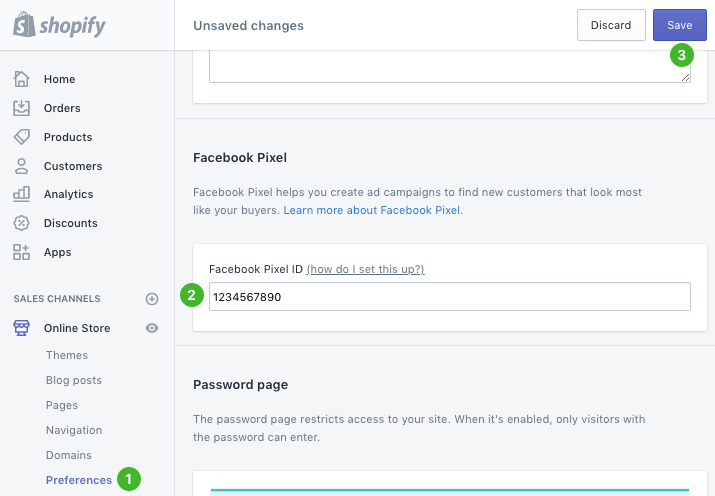
- Go to ‘Settings’ in your Shopify account
- Select ‘Online Store’
- Go to ‘Preferences’ and paste your Facebook Pixel ID (see below) into the Facebook Pixel ID box
- Hit ‘Save’
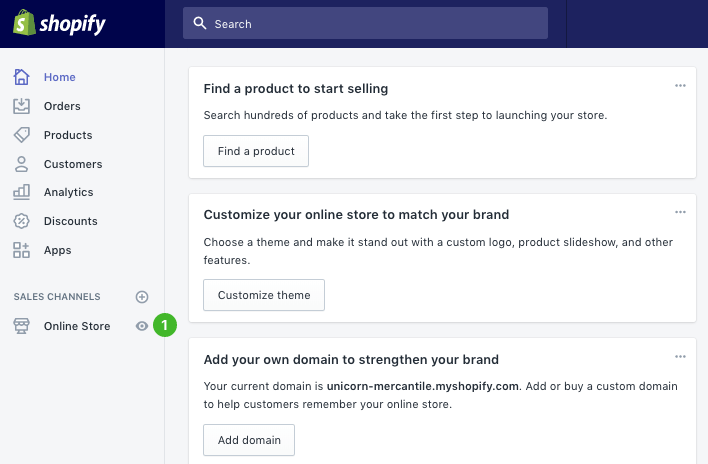
- Now go back to your Shopify Admin page and click to + symbol next to Sales channels
- Select ‘Learn more’ next to the Facebook channel
- Hit ‘Add channel’ and select ‘Facebook’ from the available options
- Click ‘Get started’ and then ‘Connect account’
- To allow Shopify to connect to you Facebook Business Page, you’ll need to verify your account information. After verification, you will be all set up and ready to sell on Facebook
5. Facebook Pixel
We’ve really built this one up, so here goes nothing… There are a raft of great summaries of Facebook Ads online. And all describe a powerful selling tool. If you place the right add and have a solid landing page, you can make a heap of sales. But, every good marketer knows that insights and data are the real money-maker. Happily, Facebook’s Pixel offers both.
The quirky name makes sense once you know that Pixel does. It’s a piece of code that sellers can add to their website’s back-end (am I the only one that finds this term a little cheeky?) to keep track of click-throughs from Facebook. In short, Pixel:
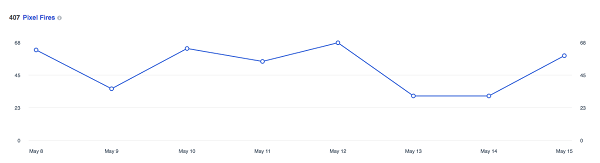
- Tracks all of the traffic sent to a site from Facebook
- Allows the user to create specific ‘events’ to keep an eye on sales-related user behaviour
The latter feature is very similar to ‘Events’ in Google Analytics. Sellers can tell Pixel to track data when potential customers view a specific product page, subscribe to an email campaign or place items in their shopping cart (and endless other possibilities). SocialMediaExaminer has a detailed breakdown of ways to make the most of Pixel.
One of it’s coolest features is that, should you set up one or more Facebook Catalogues (more on that here), Facebook can use the data from Pixel to place its increasingly popular Dynamic Ads. These are ads that target users who have shown an interest in your website or Page. It’s a particularly effective form of sales retargeting that all eCommerce businesses on Facebook should be aware of.
Pricing plans
Pixel is completely free. Hurrah!
Get started
To set up a Facebook Pixel:
- Go to Facebook Ads Manager and click the Menu button in the top left
- Select ‘Pixels’ from the drop-down Assets list
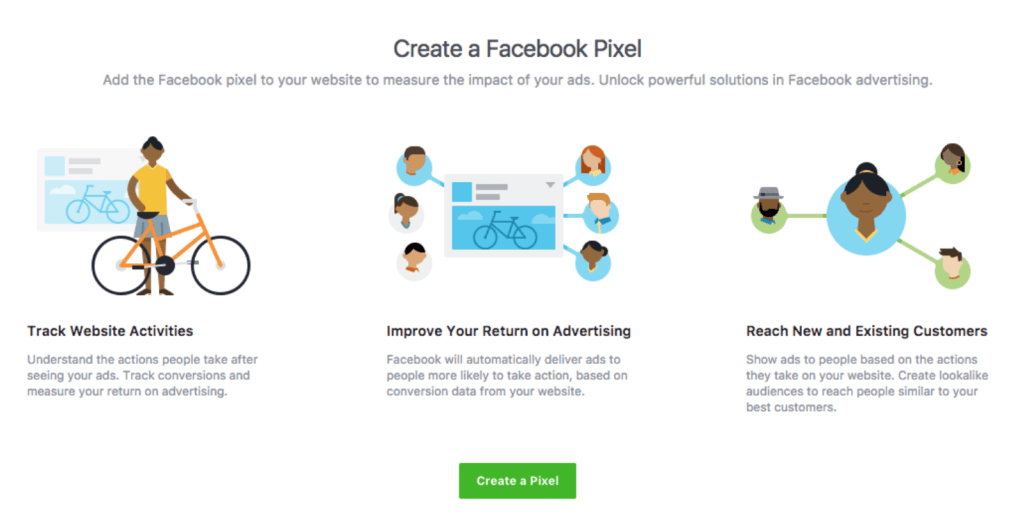
- Choose ‘Create a Pixel’ on the next page
- Name your Pixel
To complete the set up of your Pixel, you need to add the code to your website’s back-end. So, what happens next depends on whether you make changes to your code yourself, have a developer who does it for you or if your site manager makes changes using a Tag Manager.
Facebook’s full guide gives instructions relevant to each of the above options.
6. DataFeedWatch
DataFeedWatch is a leading feed marketing solution combining data transformation with help and advice that empowers merchants, agencies, and enterprises to succeed on eCommerce channels. Businesses can use this tool to transform their product data and meet the requirements of over 2,000 shopping channels with high-quality integrations.
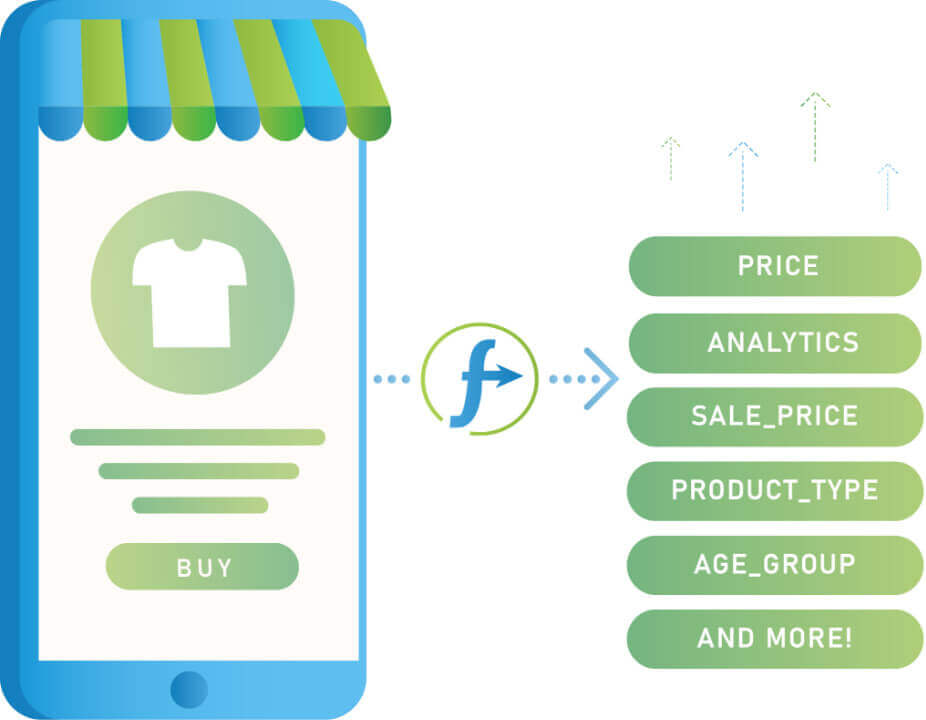
Intuitive and easy to use, DataFeedWatch gives merchants the tools to achieve greater visibility and ROAS from their eCommerce campaigns on Google, Facebook, Amazon, and various other shopping platforms. This can be seen through their various case studies. It’s a simple solution for anyone looking to cut back on time spent maintaining their data feeds while surpassing their competition.
Brands, retailers, and digital agencies alike can gain complete control over their feeds and achieve their full retail potential with this one-stop feed marketing software.
Pricing
DataFeedWatch has three standard pricing plans available. Shop: $59/mo (1k products included), merchant: $79/mo (5k products included), and agency: $239/mo (30k products included). It is also possible to have a customized Enterprise plan with an unlimited number of products included.
Get started
DataFeedWatch has a 15-day free trial available with complete support. No risk and full assistance provided!
7. Facebook Marketplace
Facebook says its Shop feature is best for “merchants, retail and eCommerce advertisers”. So, those with a fair few products to sell who do so exclusively online. But it hasn’t forgotten about local and omnichannel sellers.
Marketplace makes your items public and visible in both Marketplace itself and News Feed. This gives Marketplace sellers local visibility beyond what the Facebook Shop can offer. Sellers can further boost their reach by simultaneously posting to specialised selling Groups on Facebook as well.
Pricing plans
Good news! There are no fees for selling on Marketplace.
Get Started
To create a Facebook Marketplace listing:
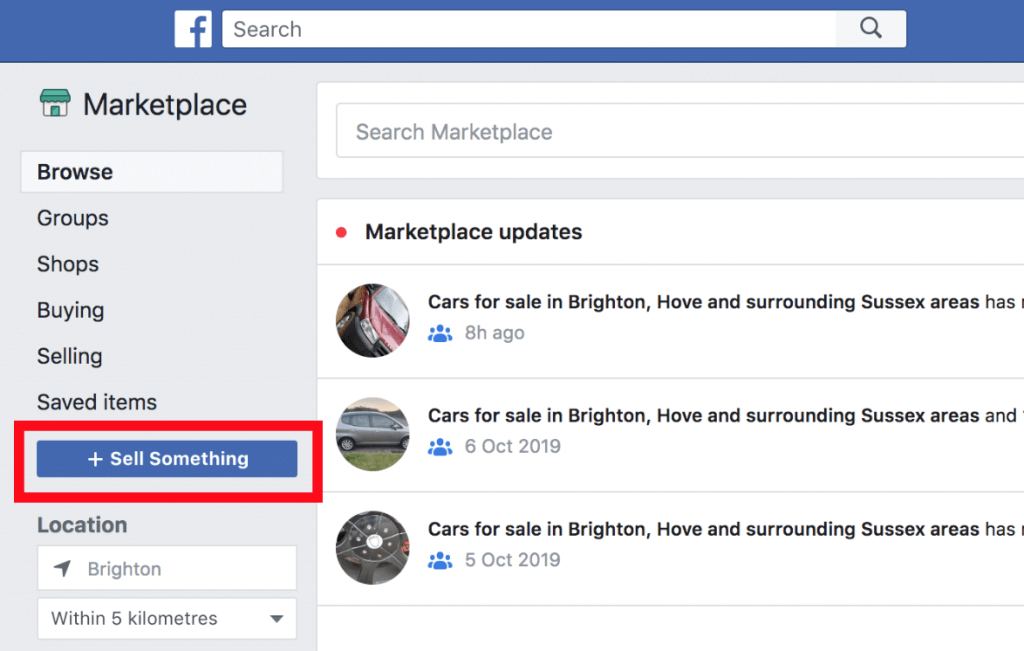
- Click ‘Marketplace’ in the left menu from your Facebook Home page
- Select ‘+ Sell Something’ button to the left of the screen
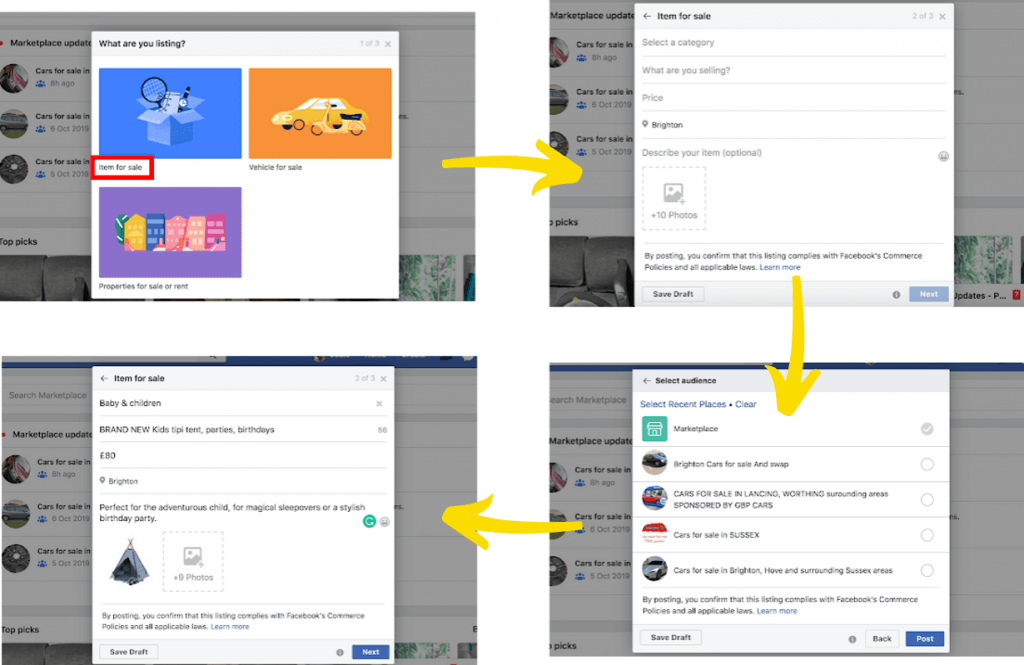
- Choose ‘Item for Sale’
- Enter the details of your listing including a description, price, location, and up to 10 photos
- Click ‘Next’ and Facebook will suggest selling Groups that might be relevant. Check all that apply select ‘Post’
8. Facebook Messenger
Contrary to popular belief, Messenger is not just a way to keep up with friends, make calls, play games and share on-point memes.

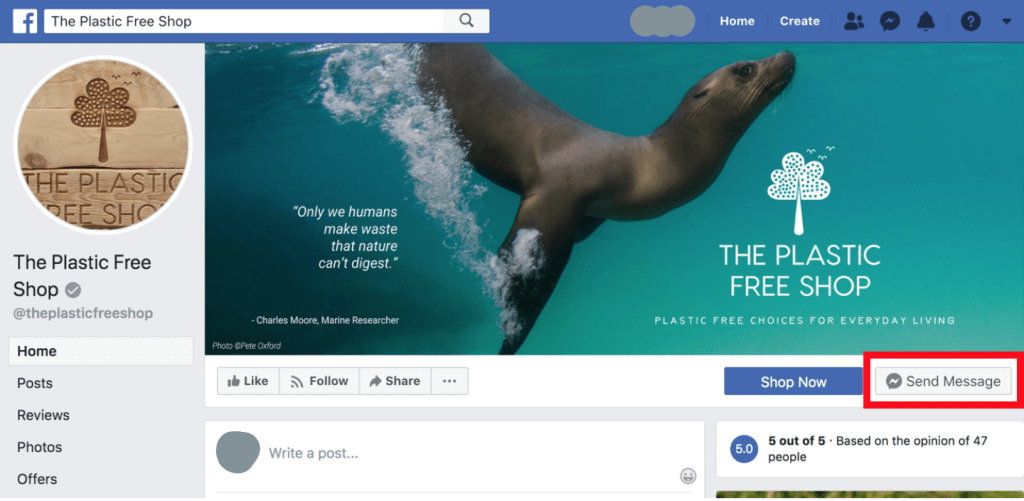
… it’s also one of the newest and most exciting ways to sell through the platform. Once you’ve set up a chatbot, Facebook users can connect with, chat to and buy from your business in Messenger (using the Buy Now button, see below).

All without leaving the app. Payments in Messenger are accepted through PayPal and Stripe and anyone following your Facebook Business Page or visiting your online store can message it.
Facebook also offers Click-to-Messenger ads and Messenger Feed ads that drive your target audience to your bot. The bonus being that, once a chat has started, businesses can retarget potential customers with ease.
Pricing plans
Messenger selling is another of Facebook’s free features, but it doesn’t create the chatbot for you or offer any in-platform way to make one. So, you’ll need to build the chatbot elsewhere.
Get started
To get started, you’ll need:
- A chatbot
- To link your Messenger to your eCommerce store
- Use Messenger Ads to drive traffic to your chatbot (optional)
You can either build one yourself or use a third-party service. Techlofy have a great guide to selling through Messenger Chatbots.
9. ManyChat
If you’re a bit of a technophobe, or just have way too many things on your plate, you might not want to attempt a DIY Messenger Chatbot. Luckily, there are plenty of services out there that’ll build one for you. One of the simplest and best is ManyChat. Its target audience are those who find the whole business of chatbot selling a little intimidating. If you want a simple yet functional solution to take it off their hands, ManyChat is for you. It can also be integrated with other apps that produce insights from your Chatbot’s data.
Pricing plans
ManyChat’s Basic account is free, or you’ll pay a very reasonable $10 per month for a Pro set-up. Features include advanced quick-start templates, growth tools, subscriber data collection and more. ManyChat doesn’t offer insights itself, but data can be exported (e.g. as an Excel file) and use in another third-party analysis application, or your own software (down the rabbit hole we go).
Get started
ManyChat has a great six-step guide to setting up a Messenger chatbot in its platform.
The lowdown
Unlike conventional retail, eCommerce is booming. An increasing number of us prefer to stay in-app to make our purchases and Facebook eCommerce tools are evolving to meet our needs.
In 2019, consumers can catch up with news, chat and buy in a single online space, and businesses can build a store, create campaigns and analyse user data there too. With these affordable and powerful tools, there’s little standing between your business and a successful Facebook eCommerce venture.
You may also like:
- Which Social Media Platforms Are The Best for eCommerce?
- What to Post on Instagram: 15 Evergreen Ideas for eCommerce Businesses
- 8 Best Instagram Ad Examples that Drive eCommerce Sales
- Instagram Ecommerce Integrations You Will Love
- 8 Effective Ways to Use Social Media for eCommerce Growth
- 10 Instagram Ecommerce Tools to Boost Your Sales
- Your Guide to eCommerce Automation on Social Media
- 35 Best eCommerce Marketing Tools
- The Ultimate Ecommerce Marketing Tips Catalog