Save hours on social, every day.
Automate moderation and replies, schedule posts, and pull reports - all in one tool.
Longing for that blue checkmark on Instagram? (Okay, the “longing” might have been an understatement. Or… was it?) Here’s how to get it and why it’s a good idea for your business.
Simplify Instagram Business
Management with One Tool
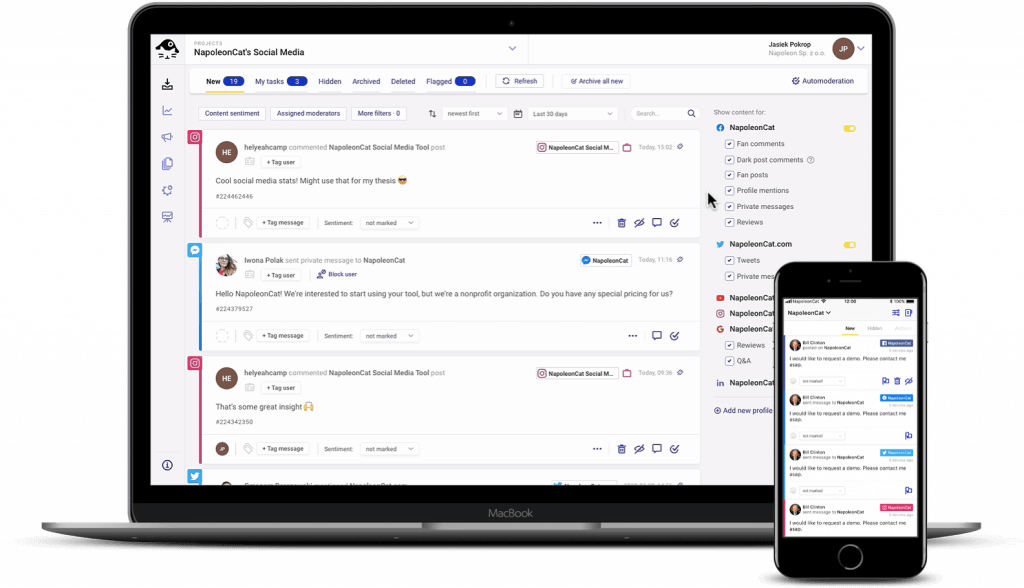
- Manage & reply to comments and DMs in one place.
- Monitor ad comments from multiple accounts.
- Automate answers to repetitive questions.
- Schedule posts to multiple accounts, on desktop.
- Analyze performance and monitor hashtags.
- Keep track of your competition.
- Create or schedule in-depth reports in seconds.
What does Instagram verification mean?
Everyone’s been on about the blue checkmark – and not just on Instagram. And with Elon Musk introducing Twitter Blue (or, sorry, X) earlier this year (as featured in multiple news sources), paid verification with added benefits started being a thing. And it was just a matter of time for others to follow suit.
But let’s get back to Instagram.
Instagram verification is the process of obtaining the blue checkmark badge for your account, letting everyone on Instagram know you’re the real deal – a.k.a. your account is official and authentic.
Now, in the olden days 👵🏻, getting the blue checkmark on various social media platforms was an annoying process (I experienced it first-hand on the platform formerly known as Twitter, sending multiple copies of legal documents to get brand accounts verified.) And Instagram can still be pretty picky about assigning the blue checkmark. Which, when you think about it, is not entirely a bad thing.
It makes verified accounts still stand out and gives them the legit status, which was the whole point behind verification badges in the first place. So, when you see a verified badge next to the account name, you can be sure the author behind it is who they claim to be, whether a person or brand. (And not someone who was quick enough to secure that particular handle first.)
Now, Instagram claims that verified accounts don’t get additional benefits in terms of the Instagram algorithm – like better reach, for example. So, the whole point is more about building trust with your followers and showing them you are indeed the real deal than getting anything extra. (This is slightly different with the Meta Verified subscription, which I’m explaining a little later in this article.)
Now, let’s look at how to get verified on Instagram in the first place.
Instagram verification requirements
Anyone can apply for the verified badge on Instagram. That does not mean, though, that anyone can get it.
Instagram is very clear about that, saying that “only some public figures, celebrities, and brands have verified badges.”
So, if you are a public figure, celebrity, or brand, some additional things to do to increase your chances of getting the holy grail, a.k.a. verified badge, are:
- Following Instagram’s Terms of Use and Community Guidelines.
- Having a public profile (so, no verified badges for private accounts. Makes sense, if you ask me.)
- Representing a real person, institution, or brand (so, no anonymous accounts.)
- Having all the necessary information on your profile, like your name, bio, and a clear profile picture. (For example, if you’re a person applying for the verified badge, Instagram will require you to have a picture of yourself in your profile photo and not of your cat.)
- Being unique – i.e., no impersonators, copycats, or dupes allowed, and only one account per person.
- Being “popular” as in engaging and searched for. This can get a little subjective, of course, and no, that doesn’t mean you need to be a huge and famous account to get verified. But it does mean that if you’re only starting or haven’t had much activity or engagement on your profile, getting verified becomes less probable.
If you meet these criteria, it still doesn’t guarantee that you will indeed get verified. But hey, it’s a start. Now, let’s see what’s next.
How to get verified on Instagram
It’s actually pretty easy to apply for Instagram’s blue check (again, no guarantee you will succeed, but what have you got to lose?)
All you have to do is follow these steps:
- Go to your profile on Instagram and click the three lines (a.k.a. hamburger menu) in the upper right corner. (If you have multiple accounts, don’t forget to check if you’re signed in to the one you’re requesting the verified badge for.)
- Tap Settings and privacy.
- Scroll down to the For professionals section of the menu and tap Business tools and controls.
- Then, scroll all the way down to Request verification.
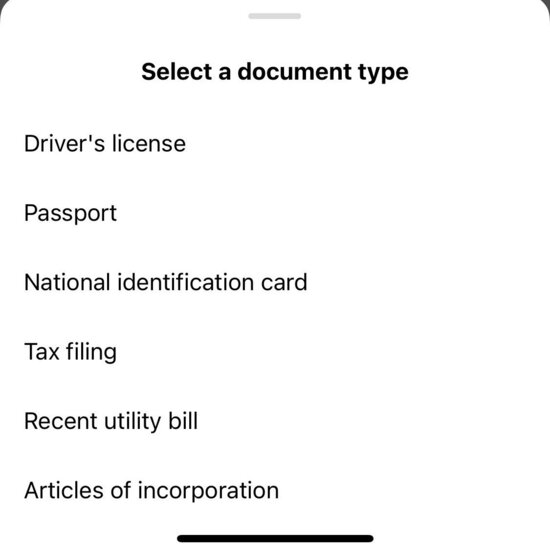
- Fill out the application form – you’ll see it has a few fields you’re going to have to fill in, plus a few optional ones that can increase your chances. Make sure you have an ID with you when you do that.
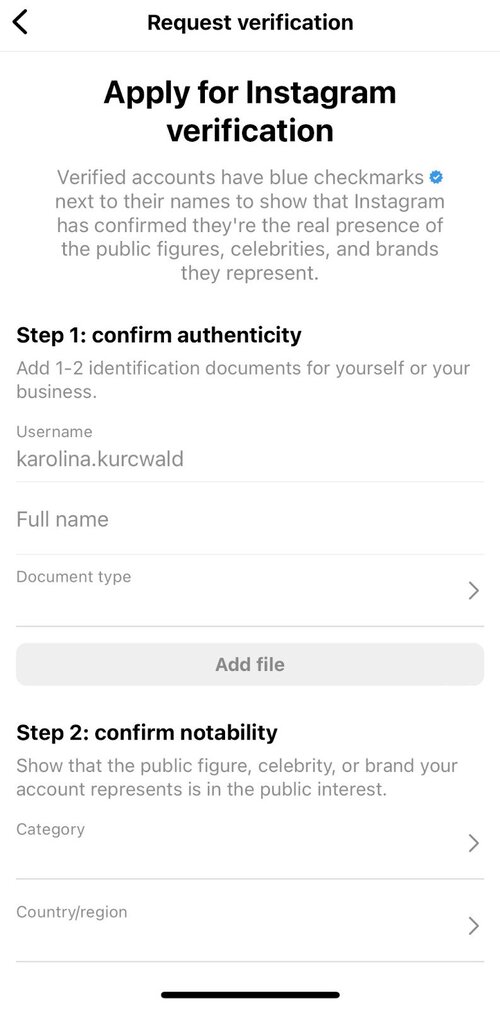
- You’ll need to upload one of the requested documents to confirm your identity.
- Describe your audience and add links if you have any to confirm what Instagram calls your notability.
- Then submit and… wait until you hear back from Instagram.
Instagram’s team will review your application – and you’ll be notified about the results in your notifications tab. This may take anything from a few days up to a month.
If you don’t get verified, you can submit a request in another 30 days. (My advice – use those 30 days to work on meeting the requirements you don’t meet now, and that got you rejected – unless you want to be rejected again, ofc. ;))
A few tips from Instagram:
- Before you apply for the Instagram verified badge, make sure you have your username sorted and won’t want to change it. When you’re account is verified, you won’t be able to change it, so you need to be 100% sure about it.
- If you receive a verified badge using false or misleading information in the verification process, you’ll lose your verified badge and might even get your account disabled. So, just don’t do that, okay?
Now, let’s talk about an alternative way to get you verified – not just on Instagram.

Protect your social media from offensive comments and SPAM
Automatically hide or delete comments containing spam under your organic posts and ads – with an all-in-one social media tool.
What is Meta Verified?
The traditional way to get verified on Instagram is one thing. But earlier this year, Meta also introduced its paid verification program called Meta Verified. It’s a subscription-based feature that’s similar to the paid blue check on X. You pay USD 11.99 when you subscribe on the web or USD 14.99 when you subscribe in the app. And you can get verified on Instagram and Facebook.
Plus, you get a bunch of additional benefits, including:
- Extra account protection and monitoring.
- Direct account support and access to Facebook’s media partner support tools.
- Exclusive stickers on Stories and Reels on Facebook and Instagram.
You will still need to get your identity verified with a government-issued ID and a selfie video. But once that is done (and you pay your subscription fee), you can enjoy that blue tick on your Facebook and Instagram accounts, plus all the additional benefits that come with it.
To get the Meta Verified badge:
- Go to your Instagram profile settings from the top-right hamburger menu in your profile.
- Tap the Accounts Centre and scroll down to Meta Verified.
- Tap it, then sign up using the profile you want to get verified. You can sign up using two profiles at once, too.
- Go through the verification steps, set up a payment method, and wait for your badge.
Congrats, you’re now verified! (For as long as you’re paying for the subscription.)
Meta Verified is available in some locations only, at least for now, so it might not be available yet to some Instagram users.
How to maintain Instagram verification
Essentially, do what you’ve been doing that helped you get verified in the first place:
- Publish engaging content and grow your followers (organically – don’t buy followers; this might have the opposite effect, actually.)
- Keep your account always public.
- Stick to the community guidelines and terms of service on Instagram.
- If you’re Meta Verified – keep paying your subscription. 🙂
As I said earlier, you won’t be able to change your username, and you might not be able to change your profile picture (at least not to a picture of your cat 🐱). So make sure you’re okay with both.
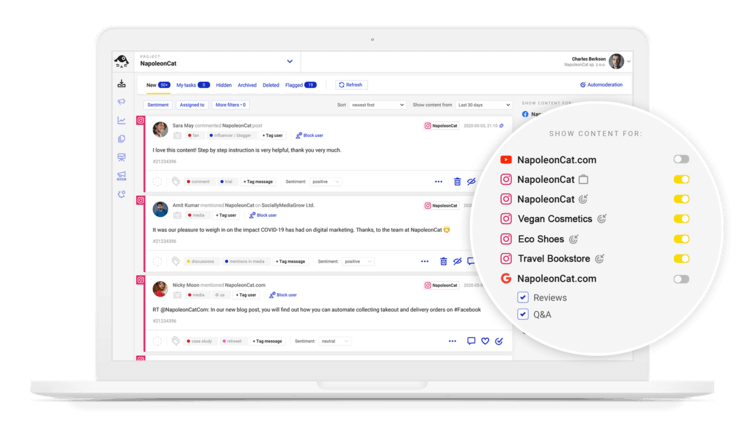
And if you want to keep building the reach and engagement on your Instagram profile for your brand, especially if you have multiple accounts to take care of, consider using Instagram management tools for business like NapoleonCat to:
- Schedule your content in advance across multiple accounts (and other platforms, too).
- Moderate comments and DMs and reply to them in one place, and not the multiple inboxes that can be a pain on Instagram, let’s face it. This also includes comments on Instagram ads.
- Analyze your Instagram performance, including hashtag monitoring.
- Analyze your competitors’ Instagram accounts for inspiration and benchmarks.
We recommend you test NapoleonCat completely for free here – no credit card required during signup 😉
Instagram verification FAQ
How many followers do you need to get verified on Instagram?
There is technically no follower threshold that will get you verified on Instagram. At least, that’s the official version.
But – per the “notable” requirement – you need to be a highly searched for person or business. Which, of course, can happen regardless of your follower count. So, what’s more important than how many followers you currently have is how much interaction you have with your followers and how engaging your profile is in general. (Which, in fact, is the foundation of social media success overall.)
How much does it cost to get verified on Instagram?
If you’re going the oldschool route, the verification will cost you nothing. But it will also be much harder to get verified that way, so bear that in mind.
If you opt for Meta Verified, you’ll be paying a monthly subscription, depending on how you sign up (USD 11.99 when you subscribe on the web or USD 14.99 when you subscribe in the app) and how many accounts you want to verify. And that’s a monthly cost you need to account for.
How do you get a blue check on Instagram without being famous?
Let me say that again – you don’t have to be famous (at least not in the traditional sense of the word) to get verified on Instagram. This means, you don’t have to be an influencer, a celebrity, or a world-famous brand to get that coveted blue checkmark. (Though I have a feeling it might make things just a little bit easier.)
But you need to be “microfamous” – and what I mean by that is being known in your corner of the Internet (however small it might be), with people who want to follow you and find value in what you have to offer on Instagram.
Of course, if you’re paying for Meta Verified, no one will even bother about the degree of your account’s popularity. The only thing you’ll need to prove is that you are, in fact, you.
Simplify Instagram Business
Management with One Tool
- Manage & reply to comments and DMs in one place.
- Monitor ad comments from multiple accounts.
- Automate answers to repetitive questions.
- Schedule posts to multiple accounts, on desktop.
- Analyze performance and monitor hashtags.
- Keep track of your competition.
- Create or schedule in-depth reports in seconds.
You may also like:
- How to Get Paid for Reels on Instagram
- How to Go Viral on Instagram (or at least increase your chances)
- How to Find Trending Audio on Instagram (and boost your Reels)
- Everything You Should Know About Instagram Reel Dimensions
- Instagram Shadowban: Is It Real? (and how to fix it)
- 400+ Best Hashtags for Instagram Reels to Use
- Crafting the Perfect Instagram Bio: 10 Ideas to Inspire You
- What’s The Best Instagram Post Size?
- All You Need to Know About Instagram Story Size
- Best Instagram Followers Apps
- 4 Quick Ways To View Instagram Stories Anonymously