Save hours on social, every day.
Automate moderation and replies, schedule posts, and pull reports - all in one tool.
In late 2019, there were over 60 million Facebook Business Pages. So, there’s both a lot of competition and a lot of opportunity for newbies trying their luck in this space.
If you plan on taking advantage of what Facebook’s key business feature has to offer, our comprehensive, step-by-step guide will get you up and running in 8 simple steps. But we won’t skimp on the info. We’ll go beyond the basics to make sure your business’s debut on the world’s largest social network packs a powerful punch.
1. Claim your Business Page
From your personal Facebook profile, locate the ‘Create’ button in the top right of the screen.
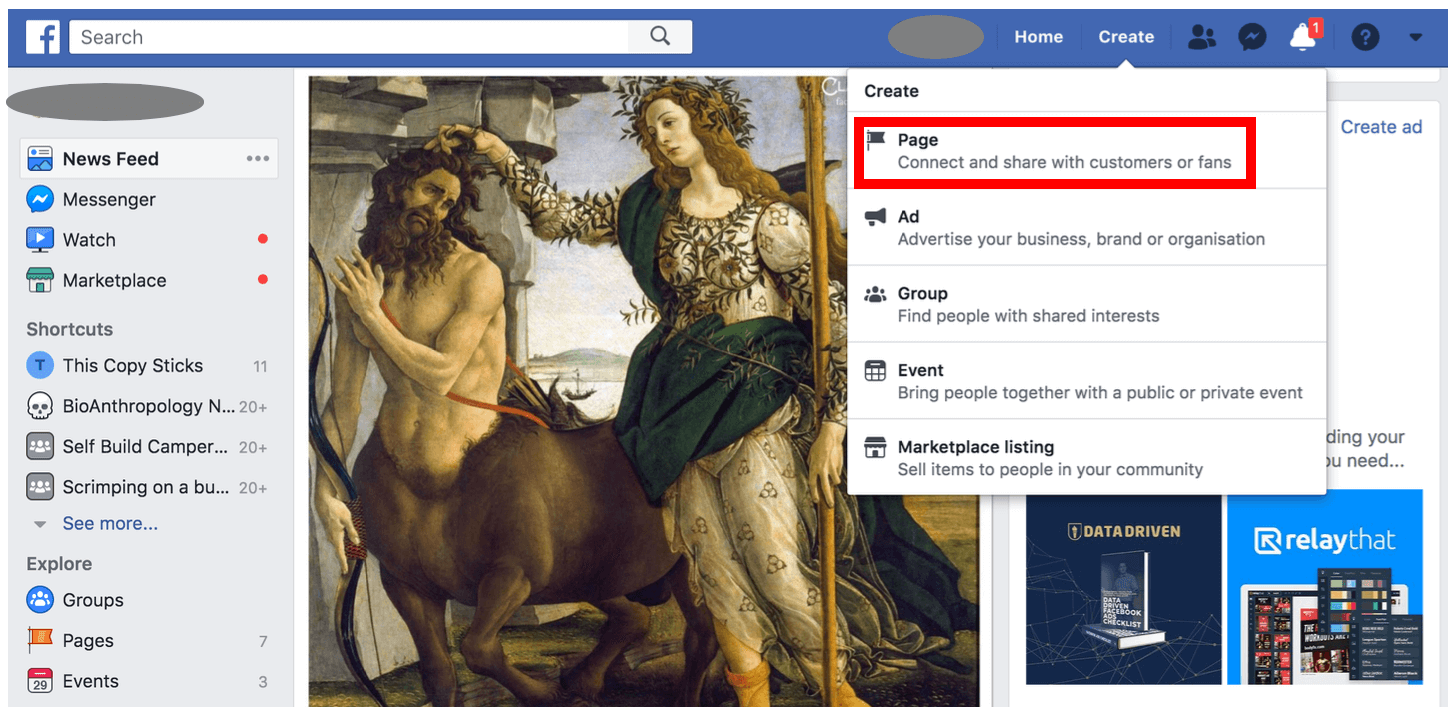
Facebook will prompt you to choose whether you want a Business Page for a ‘business or brand’, or a ‘community or public figure’.
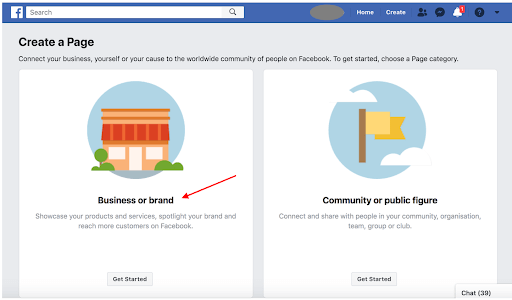
Your choice depends on what you do, but most businesses will fit ‘business or brand’. Select the option that best describes you and click ‘Get Started’.
2. Add basic page information
Next, you’ll be prompted to enter the basic information of your business.
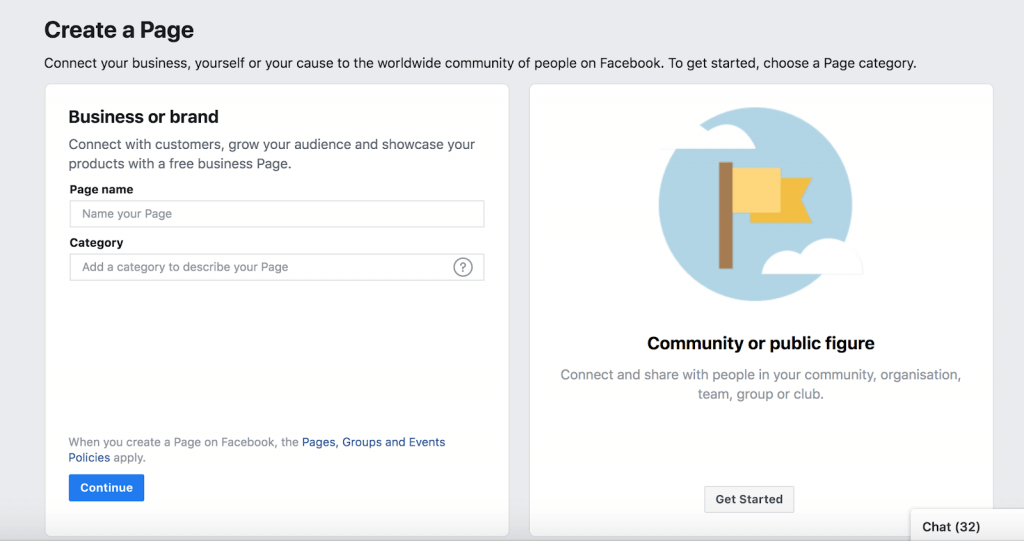
It’s important that you provide both:
- correct
- and complete
…information, so your business appears trustworthy and your Page is useful to visitors.
When entering your business address, you can choose to hide your address and display only the relevant town/city.
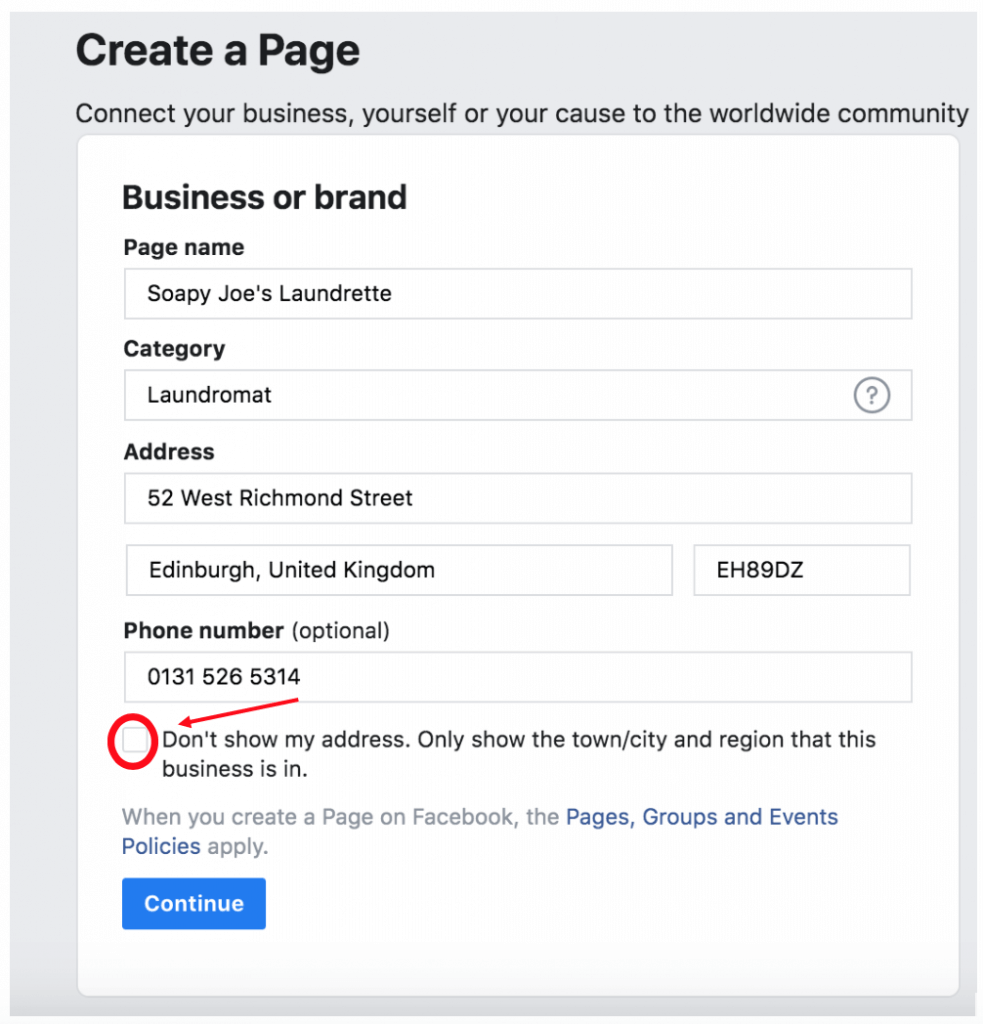
For a local business that relies on customer footfall, this is obviously not the right choice. But, if you run a cottage industry or work from home, you’ll want to select this option to keep your home address private.
Once you’ve entered your details, click ‘Continue’.
Images
Facebook then prompts you to add a profile picture which the same as your Personal Profile. So, pick something round and small that has no important details in the corners.
Then, upload a cover photo. When picking a cover image, keep in mind the display sizes: 820 pixels wide and 312 pixels wide on desktop devices and 640 pixels wide and 360 pixels tall on mobile.
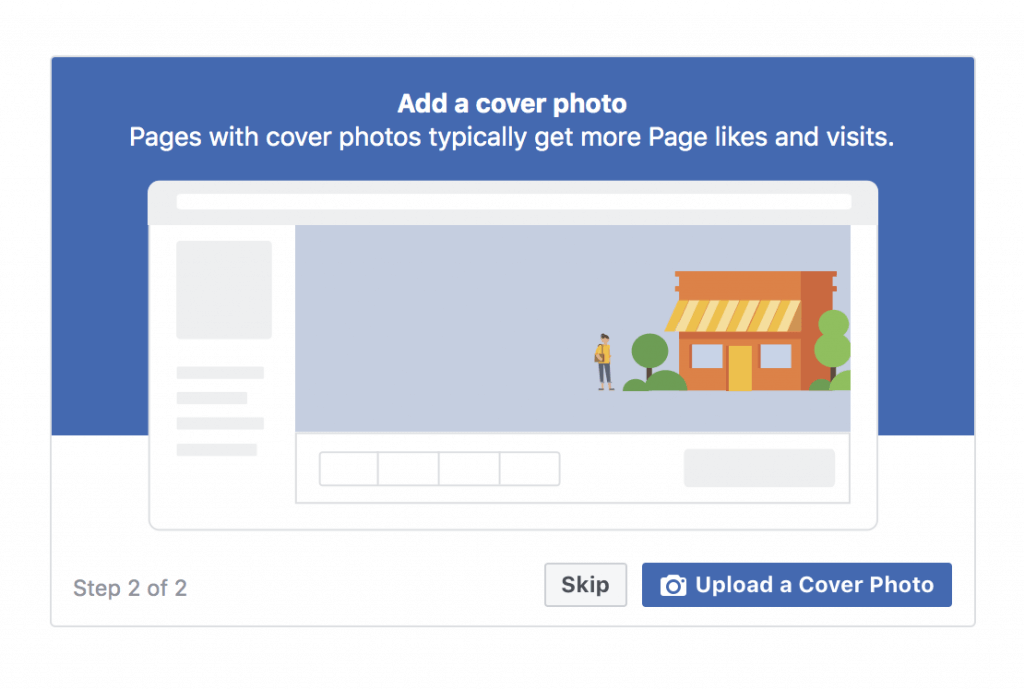
This could be an image of your business’s premises or a promotional image with information about special offers.
Facebook prompts
And, voila! Behold your basic business page.
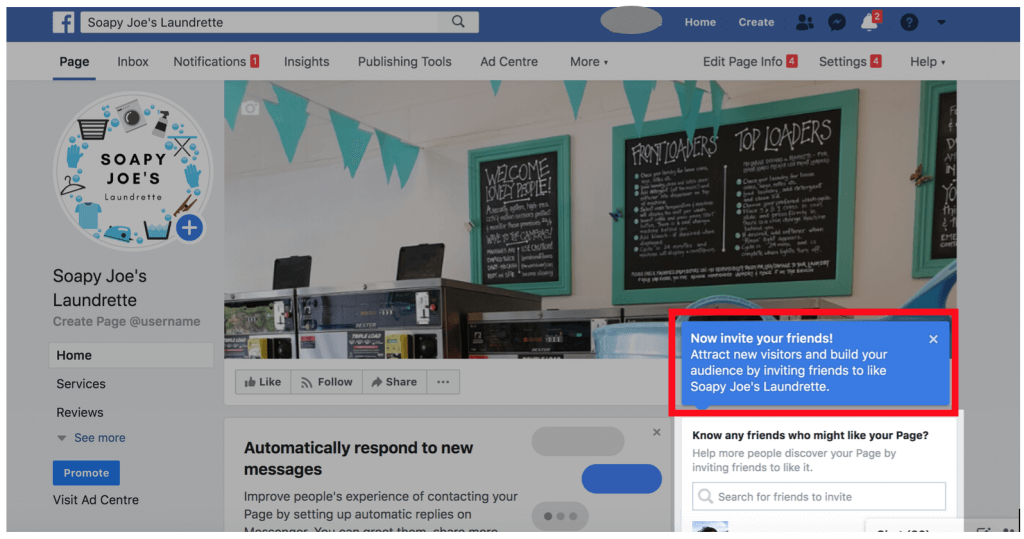
Facebook then navigates you to your new Business Page and suggests you invite your friends.
But ignore this step for now – your Page doesn’t have enough information to lure people in just yet.
Once you close the invite prompt, you’ll notice another prompt asking whether you’d like to automatically respond to new messages.
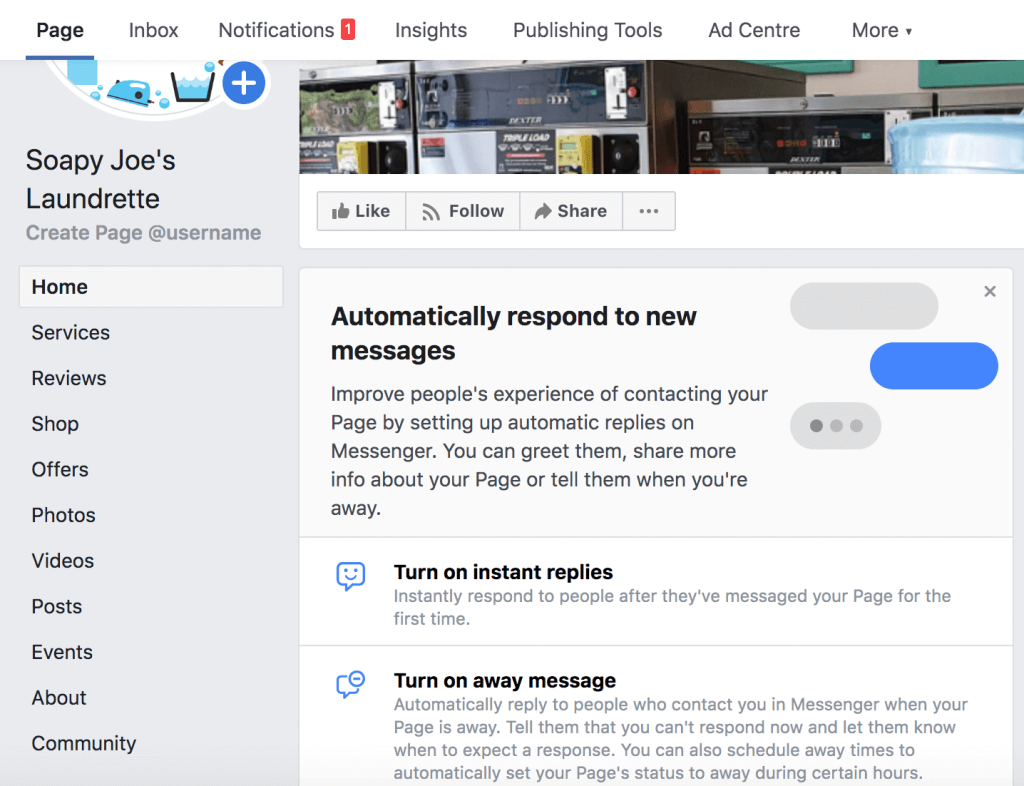
You can either turn on instant replies that offer your customers a phone number, customer service hours or a link to FAQs, or turn on an away message with the same.
Clicking either will take you to Inbox where you can manage these settings.
3. Add more page information
The basic info you entered during set up is most likely not enough to thoroughly describe your business. So, here are some other essentials you’ll want to consider including from the off.
A pinned post
A pinned post will stay at the top of your Page Feed and is usually reserved for the most important information you want to get across to your audience.
You can use it to:
- highlight your latest offer,
- direct readers to a landing page,
- ask for page likes,
- promote your latest content,
… and more.
To create a pinned post, locate ‘create post’ in your feed and start writing, uploading media, adding links, etc. Once posted, click the three dots in the top right of the post and a menu will pop up with the option ‘Pin post to top of page’.
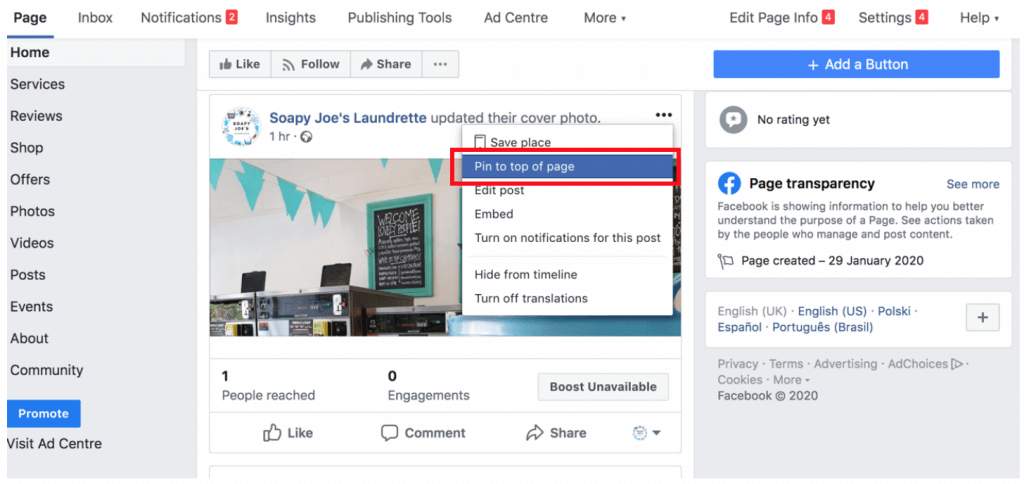
Click it and you’ll be taken to your feed where the post now appears at the top with a blue pin in the top right corner.
About
A well-crafted ‘About’ section can make or break your Facebook Business Page. To find out why, click on ‘About’ in the left bar.
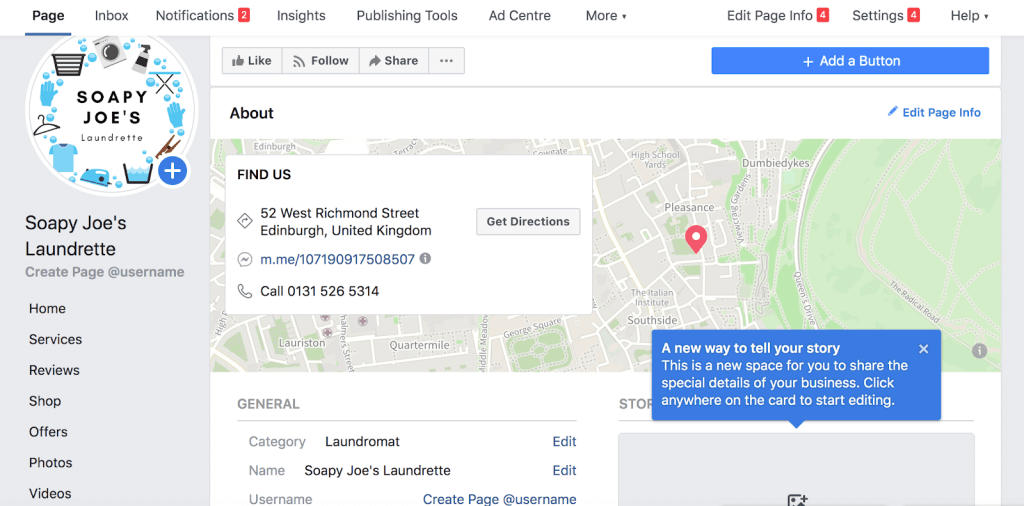
First of all, you’ll notice it’s populated with the basic info we added when we created the Page, including your business’s address (if you chose to show it) pinned to a map.
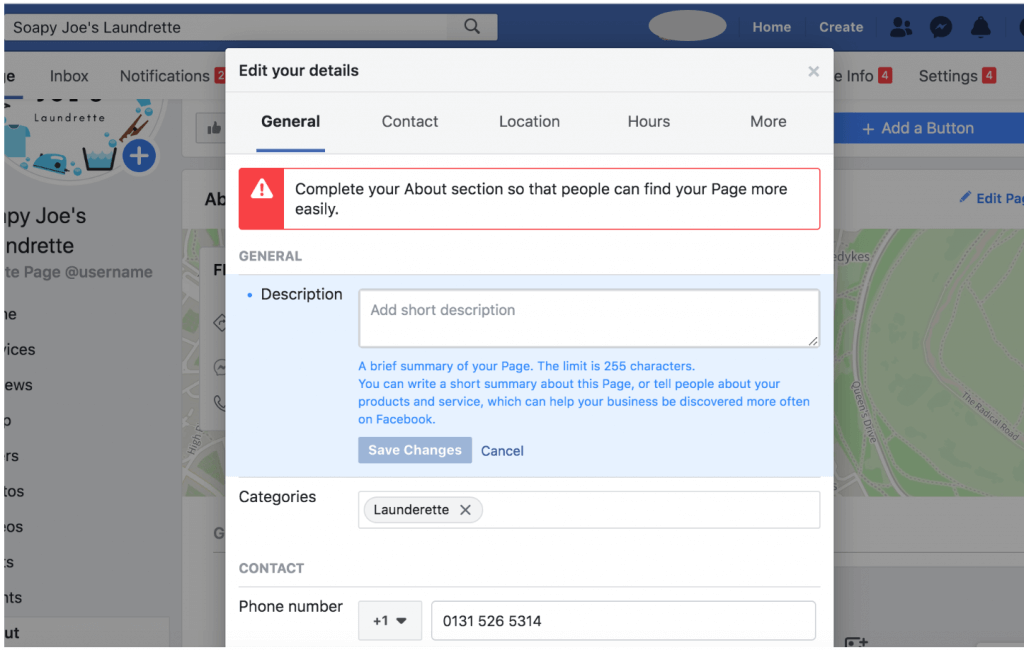
But we want to add more information. So, in the top right, click ‘Edit page info’. Then enter a description, move your map pin if it’s not in the right place, fill out your opening hours, and add a privacy policy.
Photos
Once you’ve added the essential text info, move on to adding other media. Photos are especially important if your business is local and relies on customer footfall. People use local businesses’ Facebook Business Page photos to decide whether they want to make the trip to your location or not.
So, add a few images that represent your business.
At NapoleonCat, we’ve gone for candid photos of our staff, memes that made us lol and information related to our products.
To really level up your business page, you should add content to the rest of the categories in the left bar too.
Here’s a quick summary of what they are..

Social media management
Manage unlimited Facebook, Instagram, Twitter and LinkedIn pages in a single inbox. Track competitors and improve performance using simple dashboards.
Try NapoleonCat free for 14 days. No credit card required.
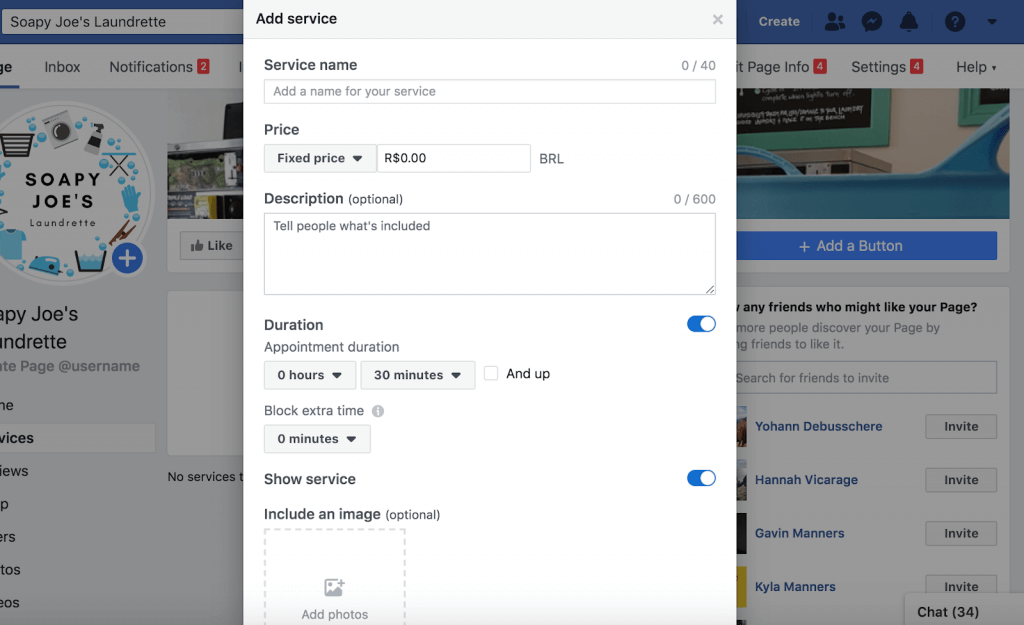
Services
This section is where you can showcase the different services that you offer. Click ‘Services’, then ‘Add Services’ and fill out the details.
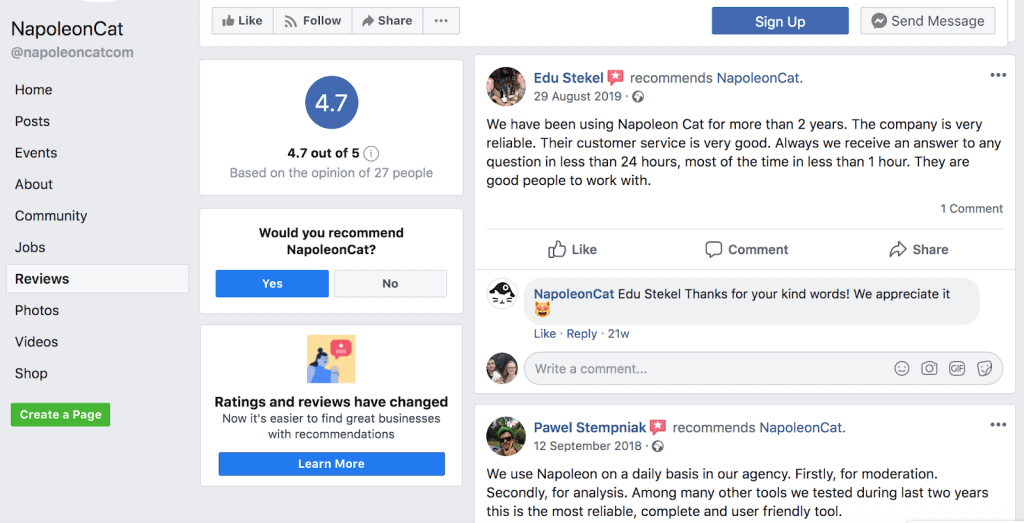
Reviews
You can’t add reviews from other channels to your Facebook Business Page, so you have to earn them the old fashioned way. When you have a few, it will look like this…
Shop
If you are an ecommerce or any other type of business that wantsto use social media to amplify sales, you can add a Shop feature to your Facebook Business Page (more on that here).
Offers
Offers is a great function for promoting your latest, well… offers, in your Feed.
Just click ‘Offer’, then ‘Create offer’ and you’ll see this pop-up.
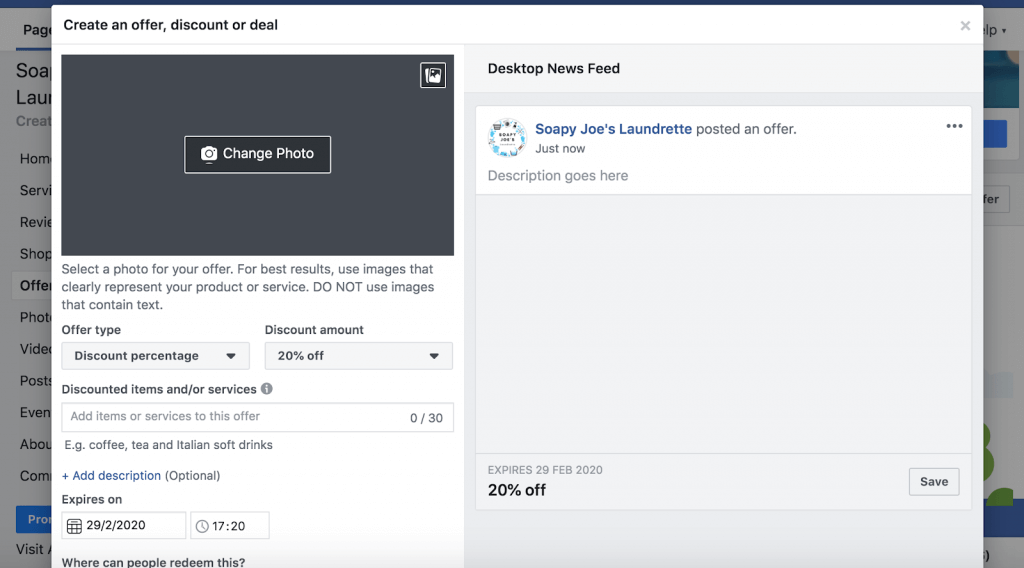
Enter the details on the left and, on the right, you’ll see a preview of how the post will look. Creating an offer is a great way to encourage Page Likes when you first start your Page.
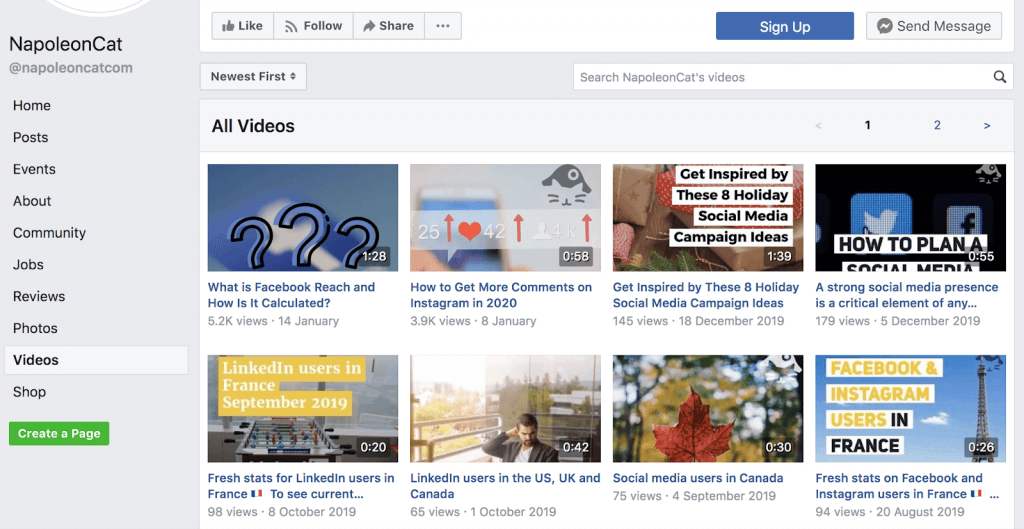
Videos
People love videos even more than they do photos. So, upload a walkthrough of your business, a demonstration of your products, a backstage insight into your business, etc.
At NapoleonCat, we use Facebook Videos to share valuable information and insights with our followers.
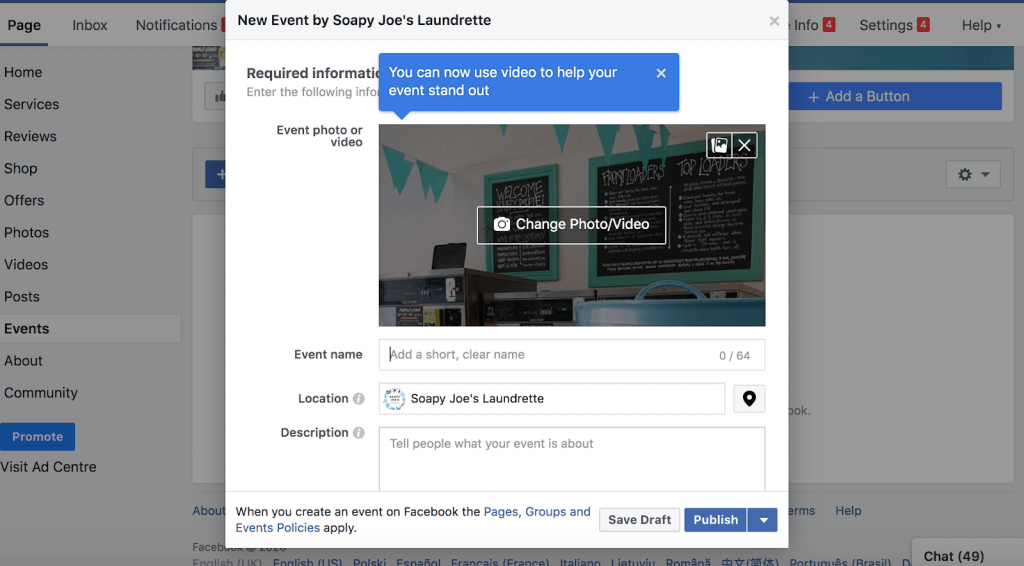
Events
You can use Events to schedule and advertise both physical and online events (think webinars, scheduled online courses).
Click ‘Events’, ‘Create Event’ and enter the usual information. You can even add ticket information, link to a landing page and assign event co-hosts.
Community
You can create a Facebook Group to build a community based around your Business Page. Here’s a guide to getting one up and running and another to optimising it for success.
4. Customise your Page settings
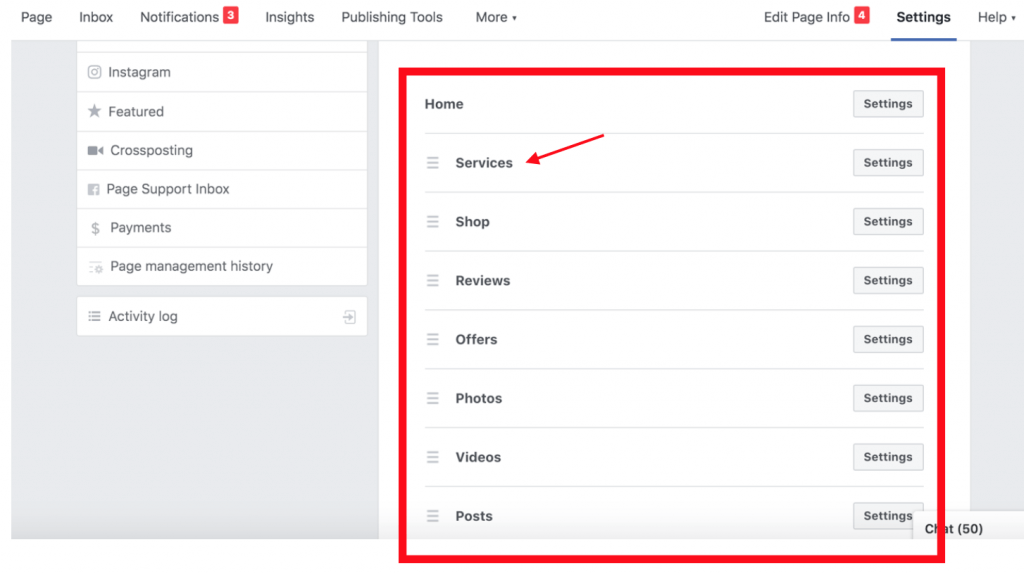
The above features appear on your page in a predefined order. But, you might not have ‘Services’ to promote because you sell physical goods. Or you might not have reviews yet because your page is new. So, do you still want those links to be featured so highly on the list? Probably not.
Luckily, you can customise this layout and other settings for your Facebook Business Page.
Navigate to Settings in the top right of your screen and then click ‘Templates and tabs’.
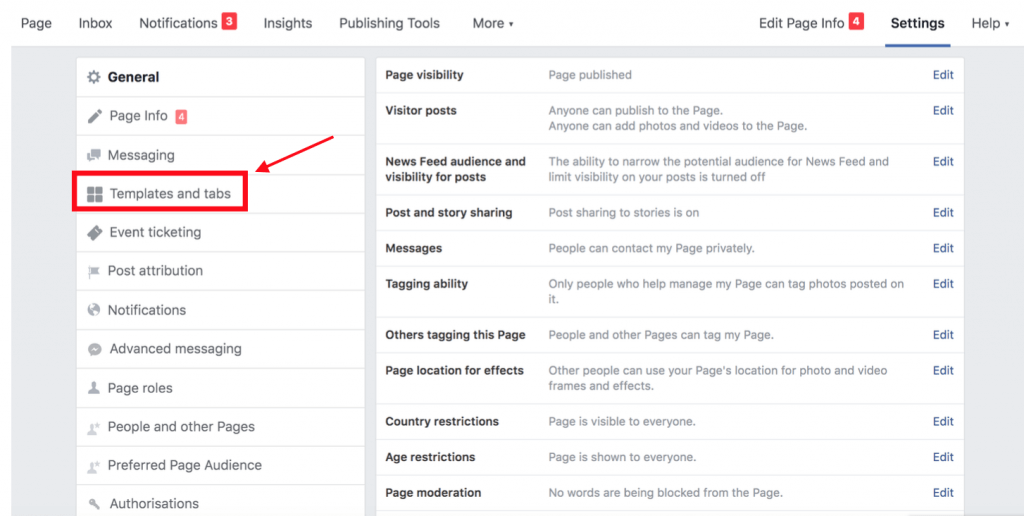
From here you can choose a template type that comes with its own default call to action buttons and Page tabs. Choose from Services, Business, Venues, Non-profits, Restaurants and Cafes and more. Alternatively, you can customise the whole thing by dropping and dragging from the list below.
Most business pages are a magnet for spam. So, it’s advisable to change your visitor post settings right from the start.
Click ‘Visitor posts’ from the main Settings menu. I recommend you select either ‘Review posts by other people before they are published to the Page’ or ‘Disable posts by other people on the Page’.
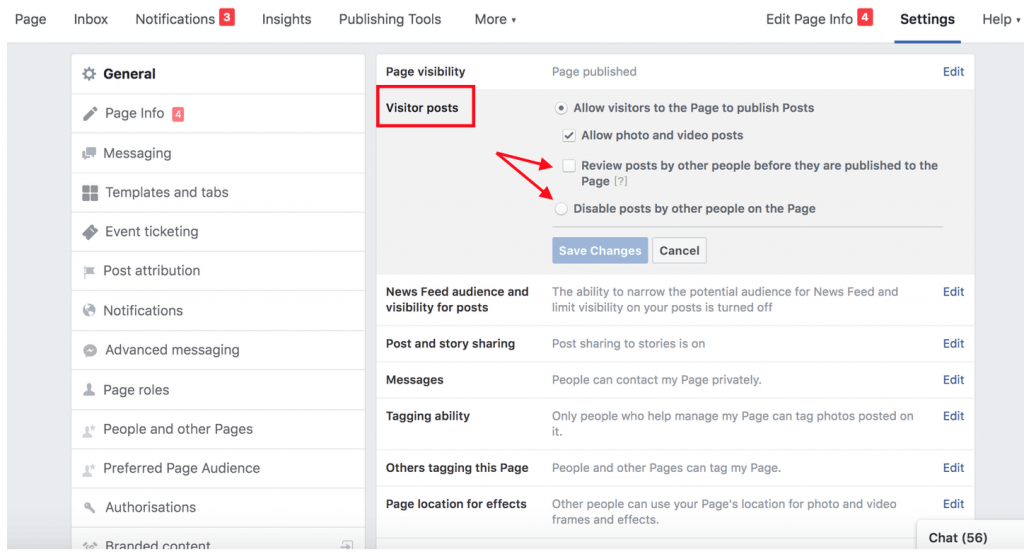
Remember to click ‘Save Changes’ after every tweak.
There’s a lot of choice in these settings, so have a play around and think about what options are best for your business.
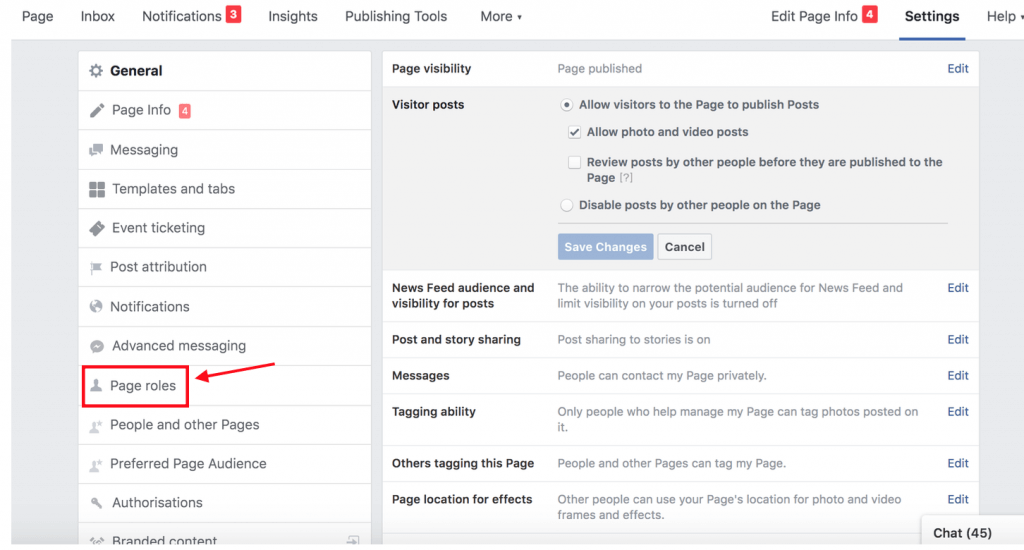
5. Set up your team
If you plan on moderating posts, hiring someone to manage your page or are lucky enough to have a team of people working on your social media, you’ll need to set them up with Page Roles.
Select ‘Page Roles’ from the left menu.
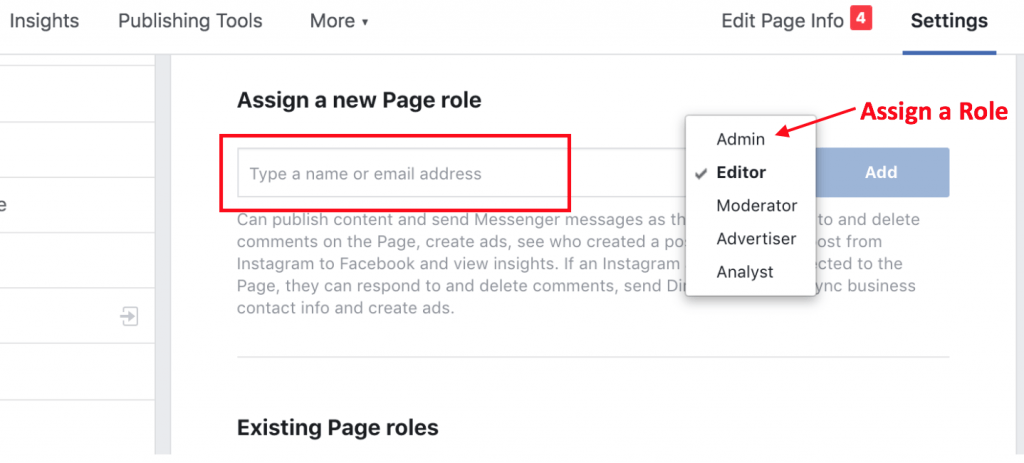
You can ‘Assign a new Page role’ or see ‘Existing Page roles’ from here.
To assign, type in the person’s name or email and choose a Role level, then click ‘Add’.
6. Add your content
Now that you have your template and your team, it’s time to add content.
Never launch a Business Page with no content! I really can’t stress this enough. People need a reason to click ‘Like’.
Create your own
Upload a photo or video, write a ‘welcome’ status, create an Event, showcase some Offers. There are many options, so don’t assume you need to write a masterpiece to get started.
Share relevant industry content
Find businesses that offer related services or who have premises in your local area and share their content.

Sharing industry content that doesn’t necessary directly involve your brand helps to:
- Fill out your page with content
- Network with like-minded businesses
It’s a win-win!
7. Get page Likes
Now is when you want to push for those first page likes. There are several ways to do it. Here are some of the best ways to get started:
- Invite people to like your page;
- Link to your page from your other social accounts;
- Link to your page from your website;
- Add your page link to your online business citations (e.g. Yelp, Google My Business).
8. Customise your username
Once you have at least 25 Page likes, you can customise your username. This boosts the SEO value of your page by making it easy to find in both Facebook and via a traditional search engine search.
Go to your Facebook Business Page’s Home page and look for the ‘Create Page @username’ button under your logo.
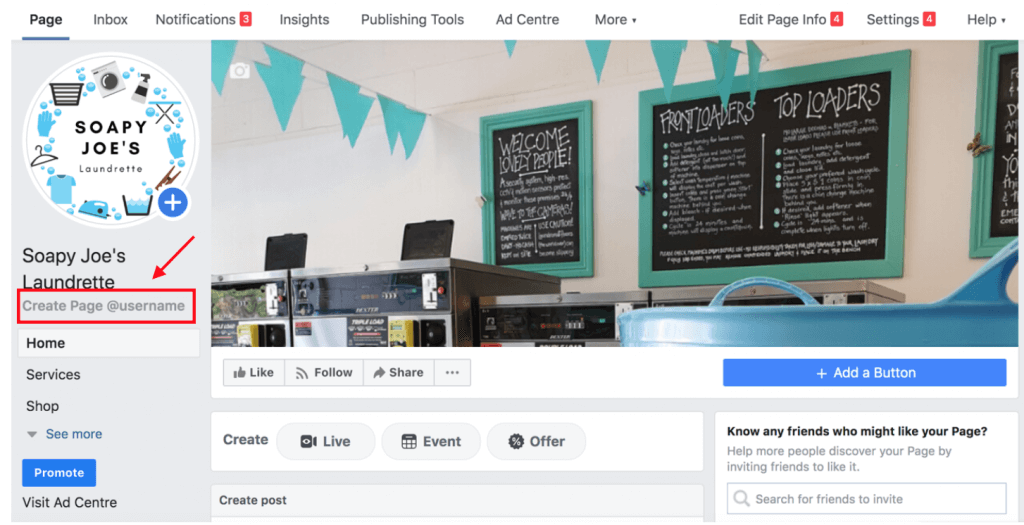
Enter your chosen username into the pop-up and save.
The final say
Now you have a Facebook Business Page that’s ready to be released into the wild. If you’ve followed these instructions to the letter, you’ll have no trouble raking in your first 100 Page Likes.
Creating a Facebook Page is a necessity and important first step for any brand getting started in social media marketing. For more advanced Facebook marketing tips, check out these articles: