If your job involves managing one or many Instagram accounts, you probably know that with a busy content schedule, in-app publishing can be quite a hassle.
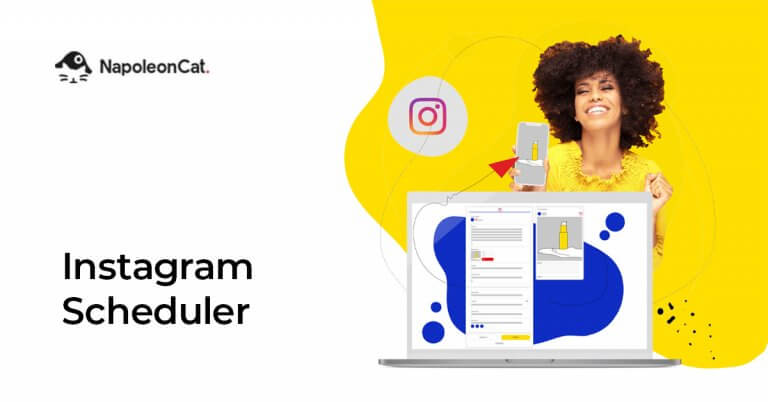
Many marketers use desktop software and web apps to get photo and video content ready for publication. Being able to complete the process and actually publish posts to Instagram directly from your PC or Mac only makes sense. Now, you can do that using NapoleonCat – we proudly introduce the newest addition to our social media management toolkit, the Instagram Scheduler.
In this article, we will walk you through the functionalities and uses of the new tool. You will learn how to craft posts, schedule and publish updates, and collaborate with your team to streamline internal processes.
Let’s get started!
How it works
As an official Facebook Business Partner, we use the Instagram Content Publishing API for posting directly to Instagram. This means that with NapoleonCat, you can securely manage the whole content publication process entirely from desktop. Planning, crafting, scheduling, and publishing Instagram posts can easily be done from one user-friendly social media management platform. Continue reading to find out more about each step of the process.
Note: Instagram stories and carousel posts are currently not available.
Getting started
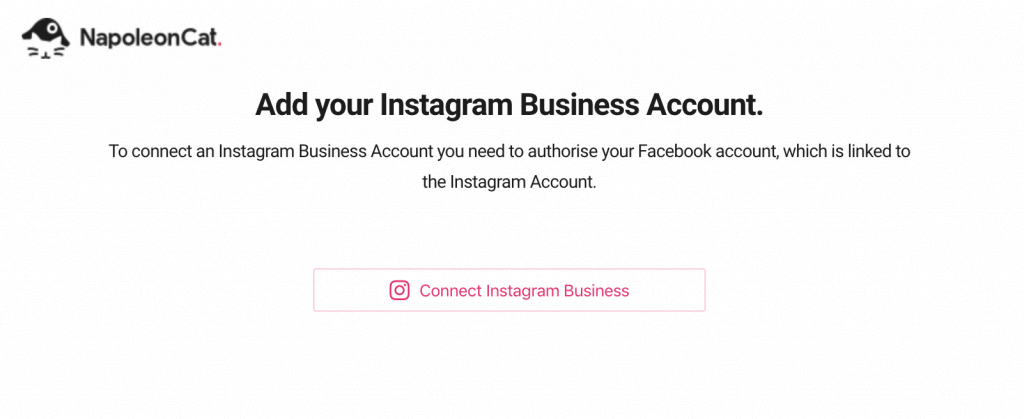
When you sign in to NapoleonCat for the first time, you will be asked to connect Instagram Business Accounts to your profile. Click Connect Instagram Business and follow the prompts in the Facebook popups that follow.
That’s it! You’re ready to start crafting, scheduling, and publishing content.
Crafting posts
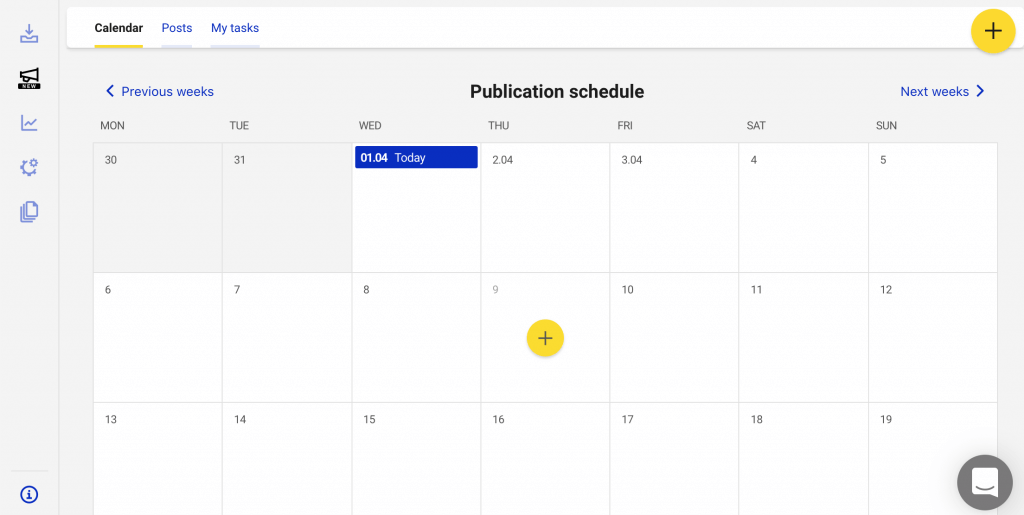
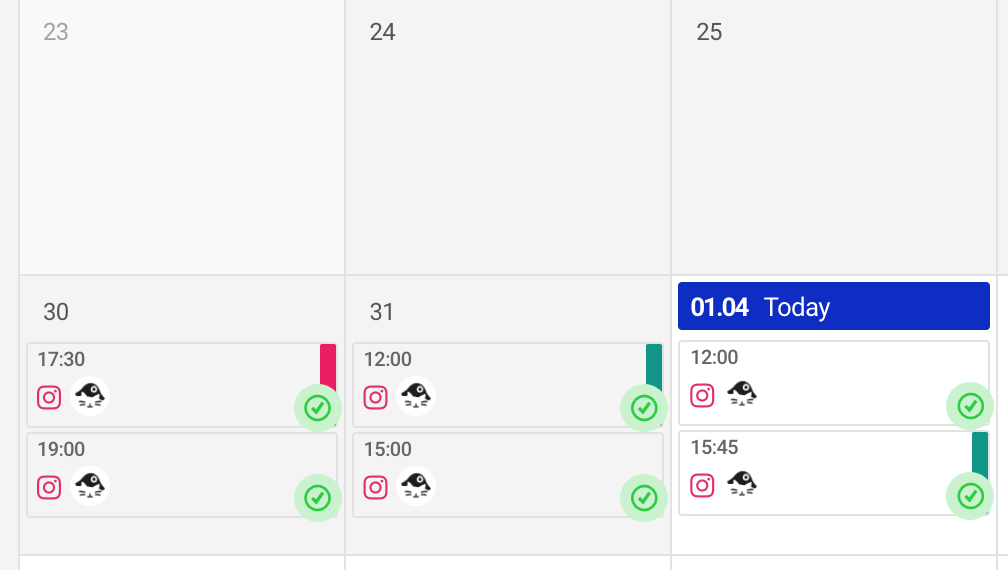
Once you connect managed Instagram Business Accounts with NapoleonCat, you will be taken to the default calendar view of the Scheduler. Select a date and click the yellow + button to start crafting your first post. If you want to pick a date at a later stage, use the button in the top right corner of the screen instead.
What you will see next is the post creator – this is where the magic happens.
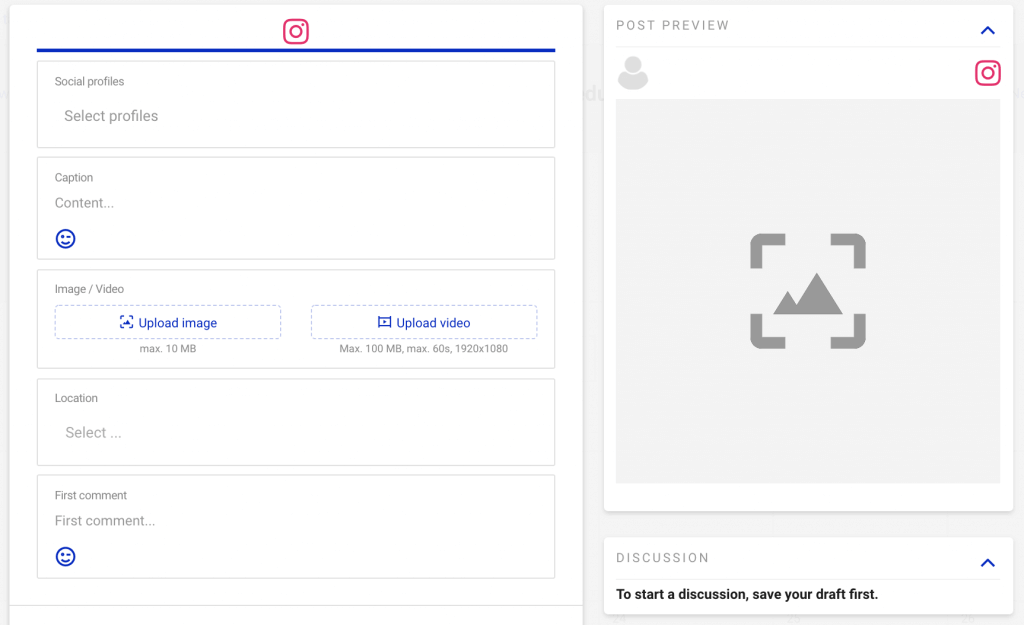
The first section of the post creator is where you, well, create your post. But there’s more to it than simply uploading an image and writing the caption. We broke it down into steps for you:
- In the Social profiles section, select the account you would like to post to.
- Then, type or copy and paste the post’s caption. You can easily browse and insert emojis by clicking the smiley face symbol in the bottom left of the Caption section.
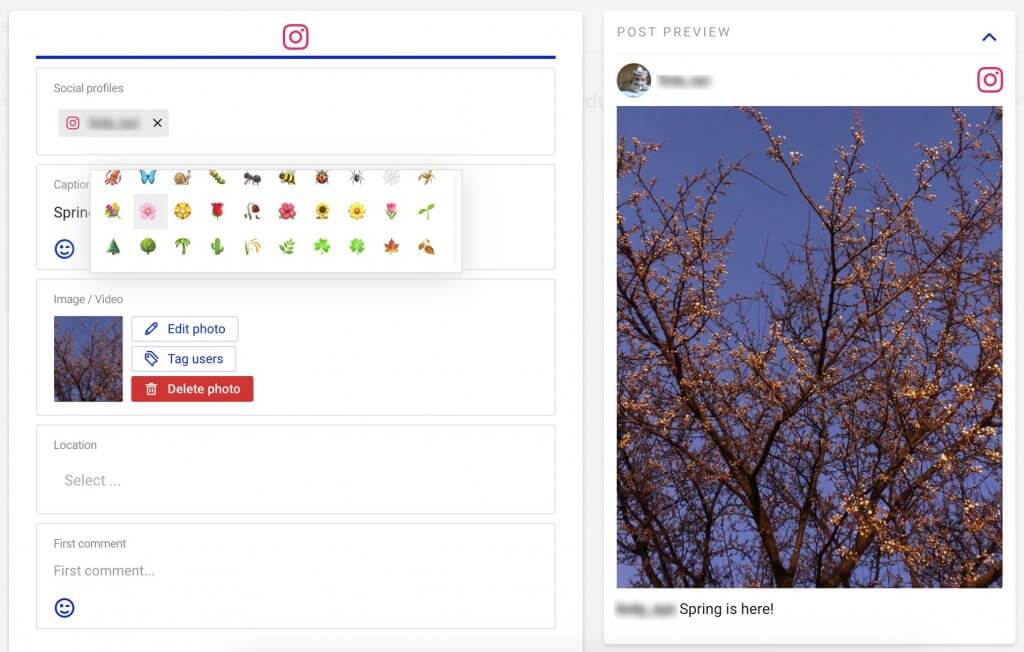
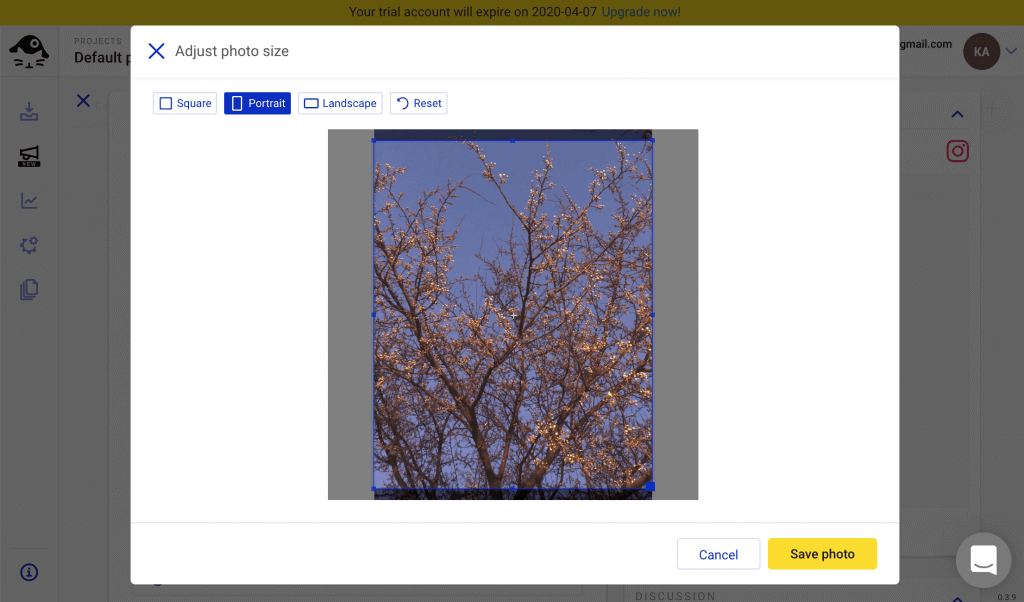
- Next, upload your image or video. During this step, you will be able to resize your image and crop it into a square or Instagram-friendly portrait and landscape aspect ratios. You can learn more about file size and format restrictions here.
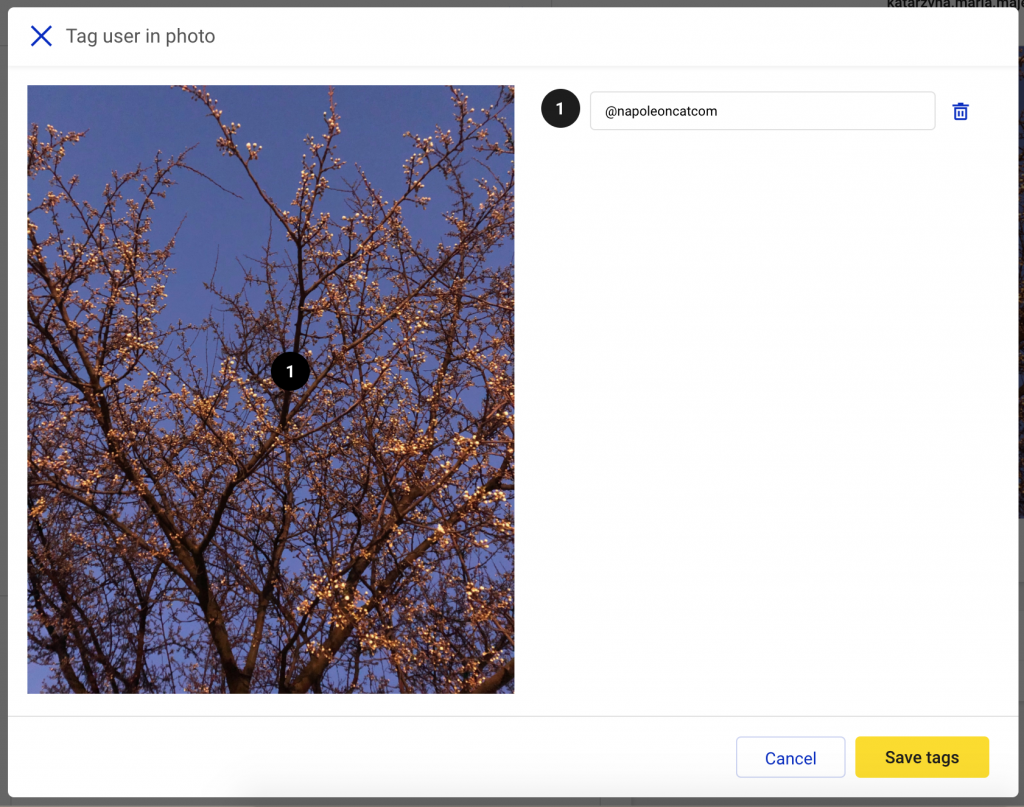
- Once your image or video is uploaded, you can tag users in it. Simply click the Tag users button, select a spot on your image, and type each users’ handle. Then, click Save tags, and you’re done. Be careful not to misspell the usernames!
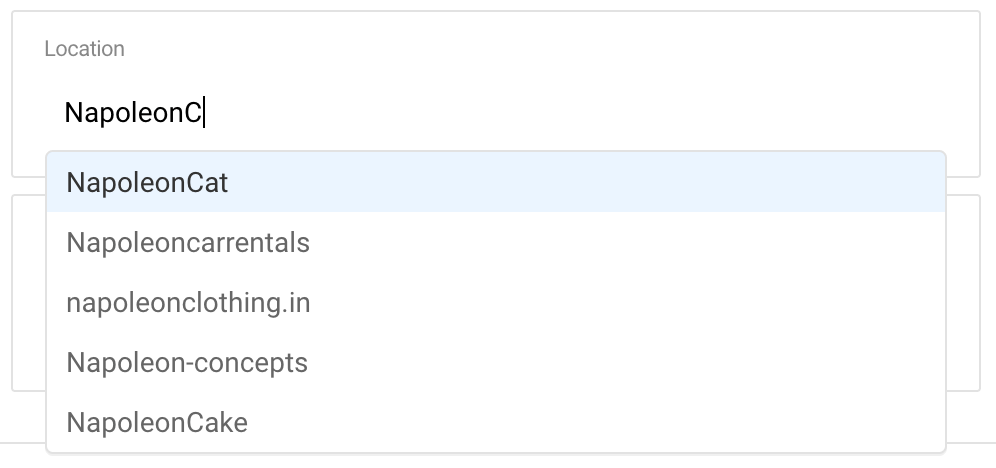
- Next, you can add a location tag to your post. Start typing in the Location section and suggestions will appear.
- Finally, you can craft the post’s first comment. This is a good placement for Instagram hashtags if you would like to give your post a clean, clutter-free look.
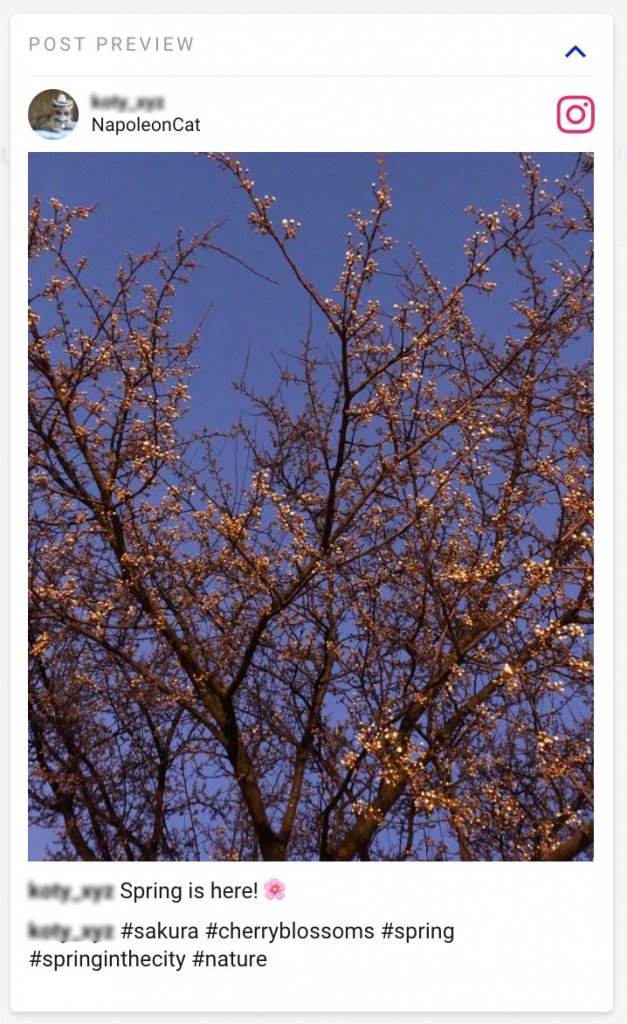
And that’s it! The content creation part of the Instagram scheduling process is done. To see how your post will look on Instagram, simply take a look at the live Post Preview on the right side of the dashboard.
Only steps 1 and 3 are required to schedule an Instagram post – the rest is optional. You can save the post as a draft at any point.
You’re now ready to move on to…
Scheduling and publishing
Once you craft a post, you can publish it directly to Instagram right away or schedule it for later. Scheduled posts auto-publish at the defined time, allowing you to reach your audience when they are active on Instagram – even if it falls outside of your working hours.
That’s the why – now, let’s move on to the how.
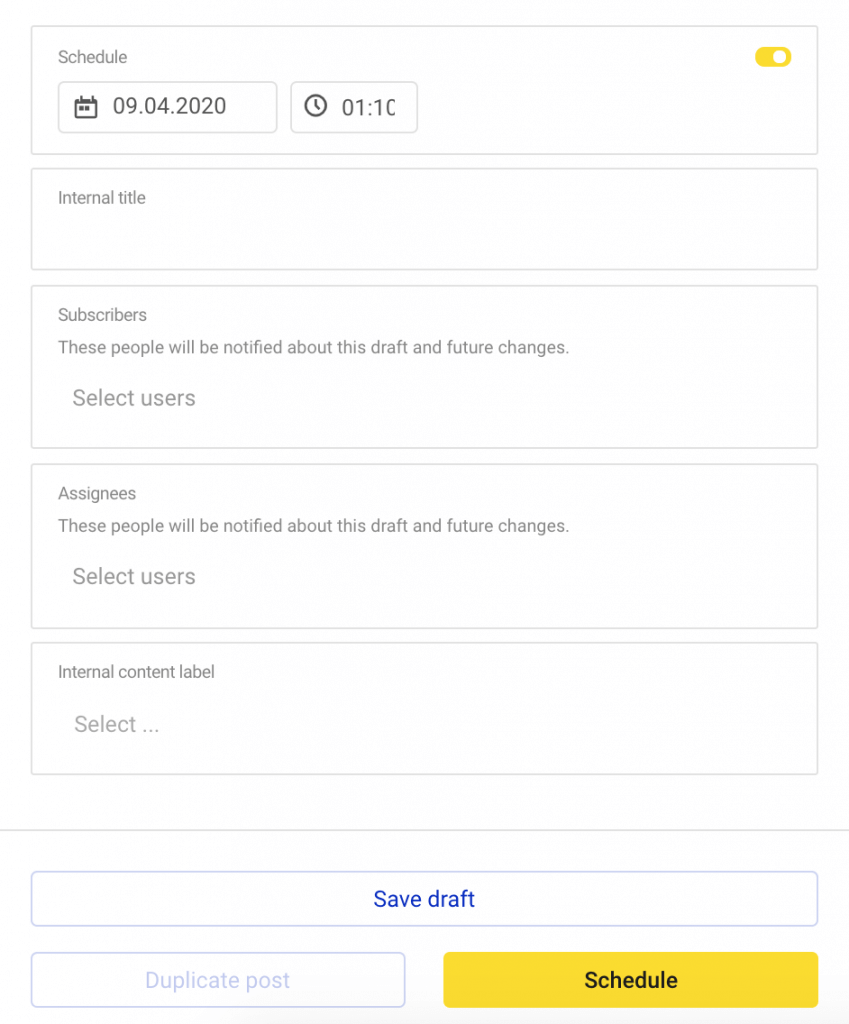
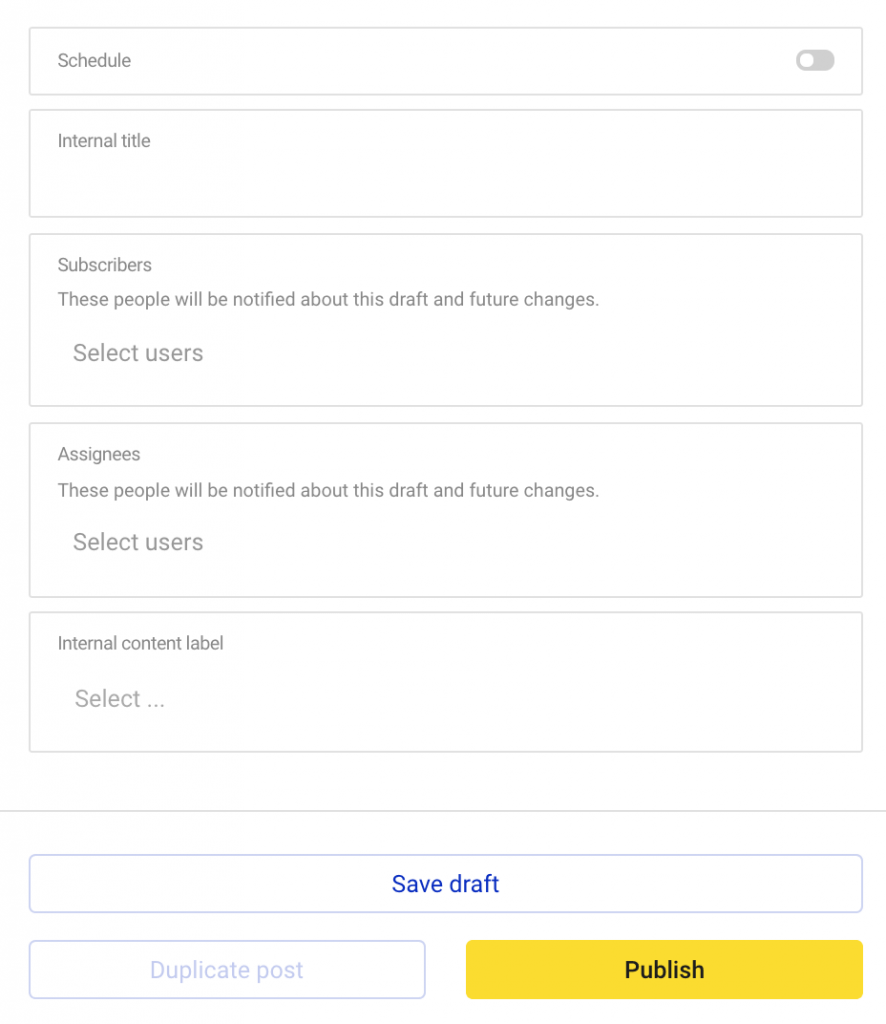
Below the content creation part of the post creator, set up the desired publication date and time in the Schedule section. Then, click the Schedule button below, and voilà! Your post has been scheduled for automatic publication.
If you wish to publish the post immediately, use the yellow switch. Scheduling mode will be disabled, and the Schedule button will be replaced with a Publish button. Click it, and your post will immediately be published to the selected Instagram profile.
Solutions for teams
Our goal is to help you save time and streamline processes, which is why the Instagram Scheduler is designed for teams. Here are the functionalities that will help you organize workflows.
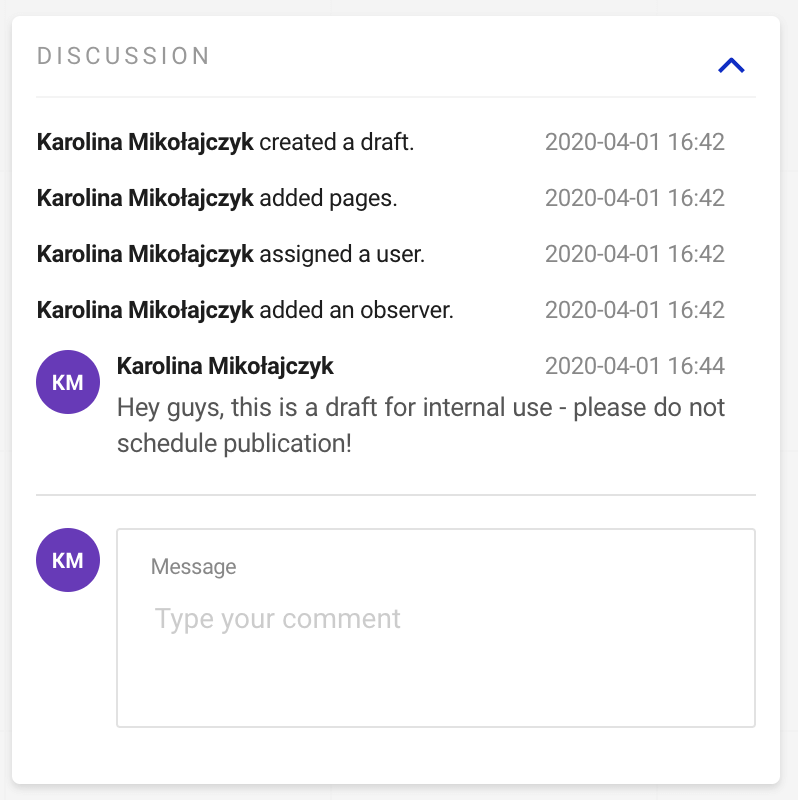
- Discussion – once a post is scheduled or saved as a draft, the Discussion section becomes a log of all related activity. You will see any changes to the post’s status here. This is also where you and your team can exchange internal notes.
- Internal titles – this functionality helps internally distinguish between posts created for different purposes. The internal titles will not be visible anywhere outside of your NapoleonCat dashboard.
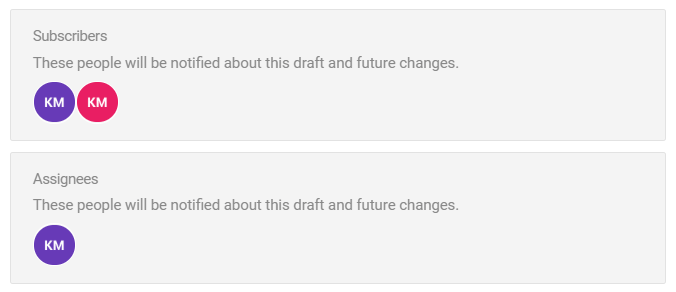
- Subscribers – subscribers are the team members who will be notified via email when the post’s status changes or when comments are added to the Discussion section.
- Assignees – a post’s assignees are the team members responsible for overseeing the lifecycle of the post. A post will automatically be assigned to its creator if different assignees are not selected.
- Internal content labels – use labels to internally mark topics, campaigns, or types of content. Using labels, you will create a color-coded content calendar.
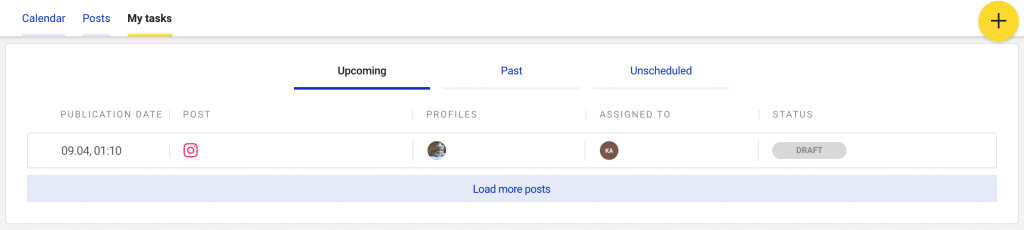
We also want to make sure that each and every team member knows what’s on their agenda. The My tasks section, accessible through the top menu, is a personalized list of posts assigned to each user of the Instagram Scheduler.
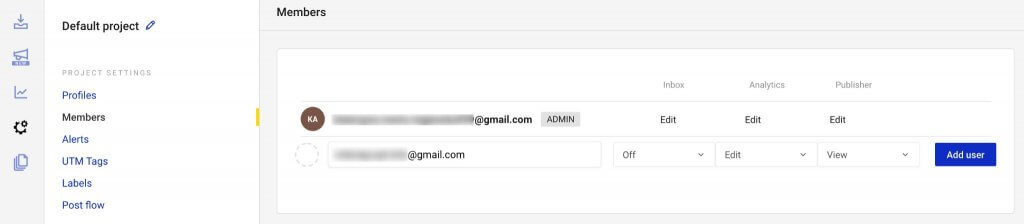
If you’re working with a big team, make sure to only give editing access to the users who really need it. Avoid mishaps by assigning viewing access to clients and team members who don’t edit or publish posts.
And that’s the gist of it!
Our Instagram Publisher is a simple tool that can help you significantly improve your everyday work managing Instagram accounts. You know what they say, though: you won’t know unless you try. Sign up for a free 7-day trial, and see for yourself!
Schedule unlimited Instagram posts
Craft, schedule, and publish Instagram posts directly to Instagram. Use our solutions for teams and organize efficient workflows.
Try NapoleonCat free for 7 days. No credit card required.